What does overproofed sourdough bread (or dough) look like?
What Does Overproofed Sourdough Bread (or Dough) Look Like?
This post will explain proofing, how to identify overproofing, common mistakes, how to fix overproofed dough, and more tips to get the best results!
What is Proofing?
The fermentation process of sourdough (and conventional yeast bread as well) is divided into two parts:
- bulk fermentation (some call this the first rise or first proof) and
- proofing (also called the second rise, final rise, or second proof)
After the bulk ferment is finished, the dough is shaped into a boule, baguette, loaf, or a dough ball for pizza dough.
The shaped dough is then placed into a loaf pan, flaxcloth couche for baguettes, proofing basket or bannetton, a baking sheet, or other container specified in the recipe.
It rests in this shaped form to continue the fermentation process.

What Happens During Proofing?
As it continues fermenting during the proof, the dough rises to 1.5 to 2 times its volume.
This rise is caused by the wild yeast continuing to “eat” the starches and sugars in the dough, creating carbon dioxide as a byproduct.
The carbon dioxide is held in by the strong, elastic dough created by the formation of gluten protein bonds.
Quick Tip on Proof Time
In many recipes, the proofing time is one-third to half as long as the bulk ferment.
The timing will be subject to the air temperature in your proofing area, so err on the longer side in cold weather and the shorter side in warmer weather.
Why Does Proofing Matter?
Proofing is critical for getting the right texture and volume in your bread. Here are four reasons why it matters:
- Shape: Creates a beautiful shape that is lovely on the table.
- Oven Spring: Ensures that the dough springs well, allowing the dough to rise and expand during baking.
- Texture: Results in a soft, airy interior.
- Even Crumb Structure: The crumb of the bread will be even, with consistent holes throughout the slice.
- Best flavor: Fermentation not only affects the volume of the bread, it affects the final flavor.
- Bake time: Overproofed dough browns more rapidly due to a higher amount of sugars.
Stages of Proofing
There are three stages of proofing: underproofed, proofed, overproofed.
As the sourdough bread dough rises, it will move through these stages.
What is Underproofed?
Under-proofed dough is dense and has not increased in volume.
This results in a dense bread with a very tight crumb that lacks the pillowy texture. The flavor will also be underdeveloped.
If you suspect you have underproofed dough, let it rest longer for optimal proofing.

The Just Right Proof
When the sourdough bread dough proofs, the goal is to stop the proofing process by baking the bread at the right stage.
Once the dough is proofed, it should expand to 1.5 to 2 times its original volume.
In a round banneton (proofing bowl) or loaf pan, the dough should rise up to the brim (there may be some variation depending on size).
This post explains in detail what to look for: When is sourdough finished proofing? The signs and a test
What is Overproofed?
Over-proofed dough has rested too long, causing the yeast to produce too much carbon dioxide, weakening the gluten bonds.
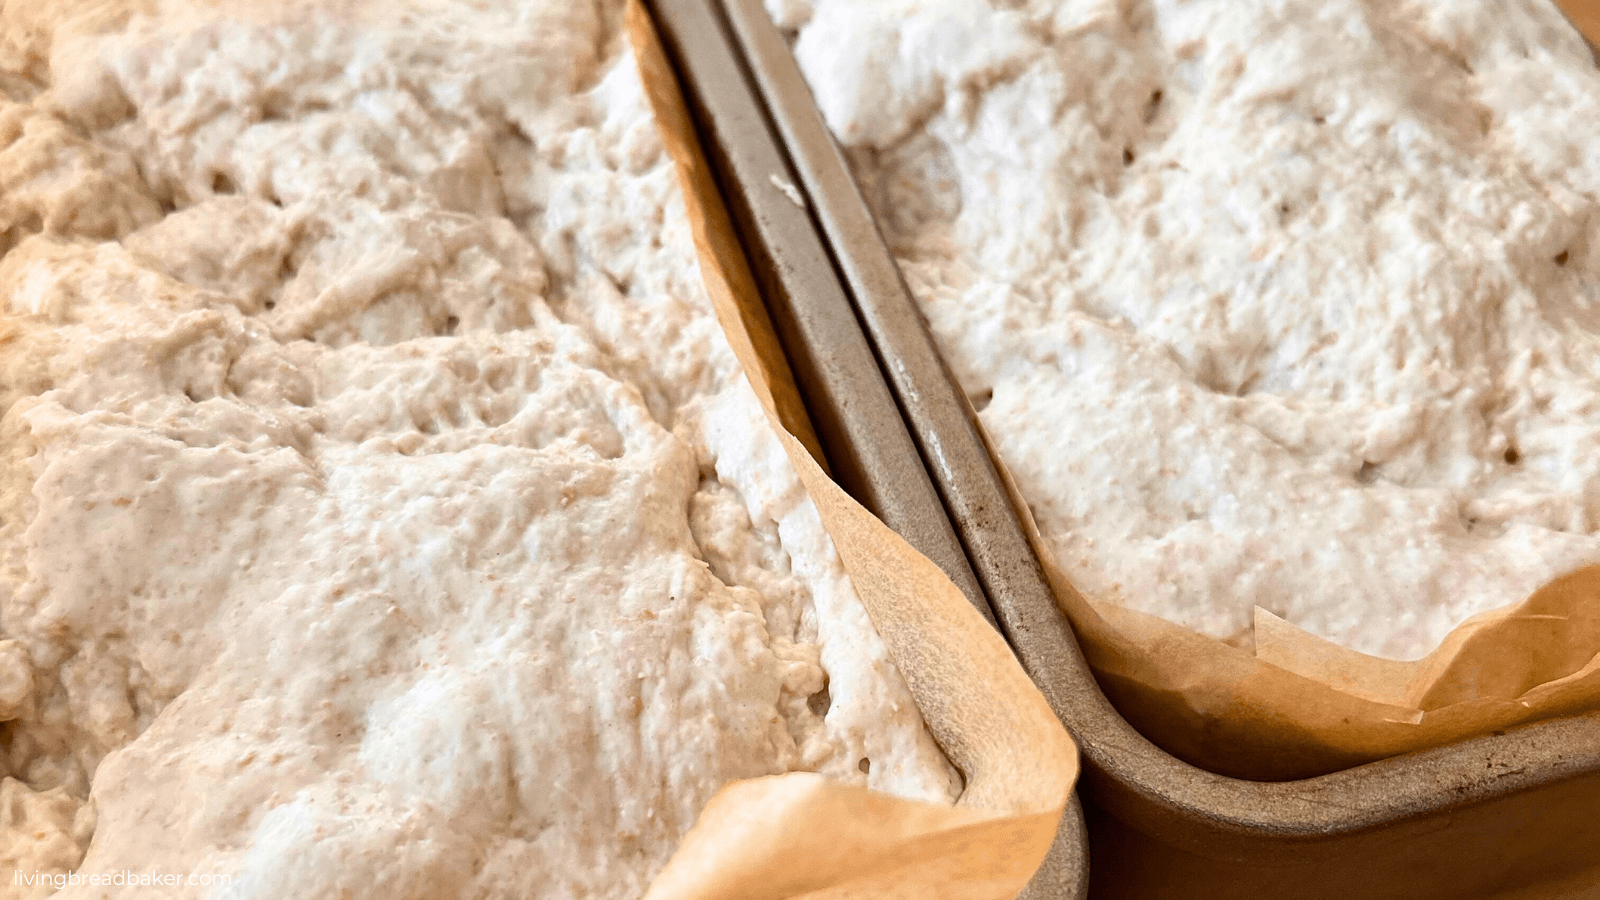
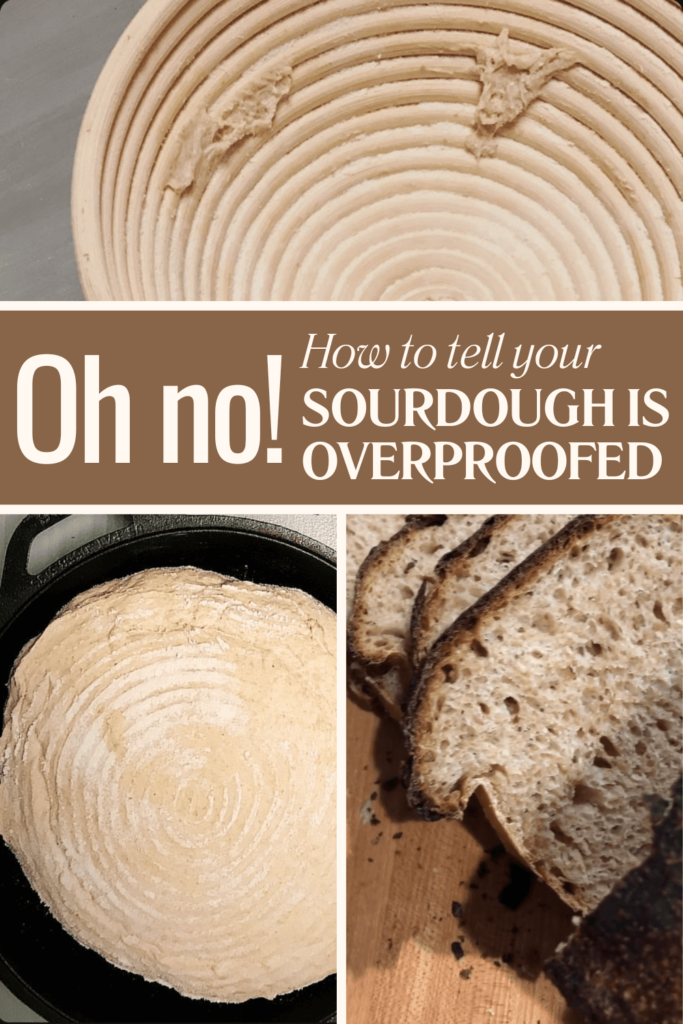
The dough will look very puffy, but when touched or moved, it may deflate or sag. Here are some examples of overproofed sourdough bread as well as dough:
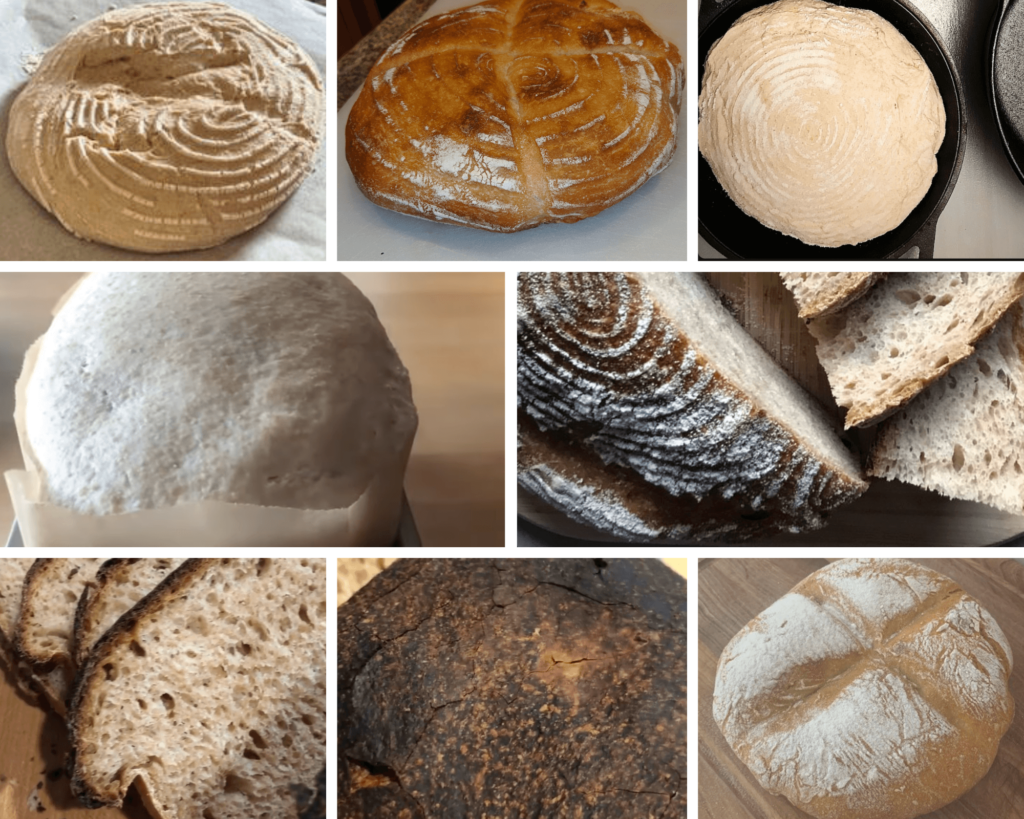
The surface of the dough may have a sagging, dimpled appearance rather than a smooth, rounded look.
Here’s an example of a severely overproofed sourdough bread sandwich loaf:
What is the impact on flavor and texture
A baked sourdough loaf that was overproofed will have a dense interior that might even have a gummy texture.
Overproofed sourdough bread will be more sour and acidic. (The sourness is not the pleasing traditional San Francisco style either.)
When you bite into the bread, instead of a nice airy bite with some chew, it will be more chewy and dense.
The Science of Overproofed Sourdough Bread
The yeast and bacteria of the sourdough starter feed on the carbohydrates in the flour of the dough and create the carbon dioxide gas that makes the bread rise.
This happens as the gluten is developing in the dough creating strong, stretchy webs that trap the gas bubbles.
If this fermentation process continues for too long, the yeast and bacteria will continue breaking down the carbohydrates so that the gluten network in the dough becomes weak.
As this weakening takes place, the exhausted dough can no longer hold in the gases which results in deflating and/or very little rise as the loaf of bread bakes.
Cold vs. Room Temperature (Ambient) Proof:
The dough proofs at room temperature or in the fridge for a cold proof, or a combination of the two.
Room temperature proofing has the shortest timeline, while cold proofing takes longer and creates more complex flavors.
Read more about the differences in this post: Cold Fermentation vs Room Temperature: Which Is Better?
Advantages of Room Temperature Proofing
- Faster than cold proofing
- Easier to monitor
- Results in a more tangy flavor during the final fermentation
Disadvantages of Room Temperature Proofing
- Many variables: changes in season, humidity, time of day all impact results
- Less room for error because it goes faster
- Room temperature dough is more difficult to score before baking
Advantages of Cold Proofing
- Consistency: the fridge is made to create a consistent cold temperature year-round
- Creates a more complex flavor
- Results in more digestible bread due to slower fermentation
- Easier to score the dough before baking
Disadvantages of Cold Proofing
- Takes longer: 6-14 hours
- Can result in underproofing
Proofing Tools:
- Electric proofing box: For the serious home baker who wants an automated proofing process.
- Overturned Plastic Bin with a Bowl of Steamy Water: Creates a humid, warm temperature environment.
- OFF Microwave or Oven: Offers an insulated environment for proofing.
I really loved some of the ideas shared in this post by Taste of Home, if you are looking for a few more ideas to get the best proof, even in winter.
Common Mistakes Leading to Overproofing
- Not Monitoring the Dough: Set a timer with enough time for short end of proofing range and check periodically.
- Too Warm Environment: Aim for a consistent ambient temperature. (A temperature between 75-80°F / 24-27°C is ideal for room temperature proofing) Fermentation time varies depending on the temperature. Warmer temperatures can cause over-proofing.
- Miscalculating Proofing Times: Check your dough earlier than the recipe suggests.
- Type of Flour Choice: Something as simple as swapping out bread flour for all purpose flour could result in a weaker dough structure that become overproofed. Dough made with more whole wheat flour will also ferment or proof more rapidly than a bread made with all white flour.
How to Fix Over-proofed Dough
- Deflate and Reshape: Gently deflate and reshape the dough to redistribute the yeast.
- Cold Retardation*: Place the dough in the fridge for a few hours before baking.
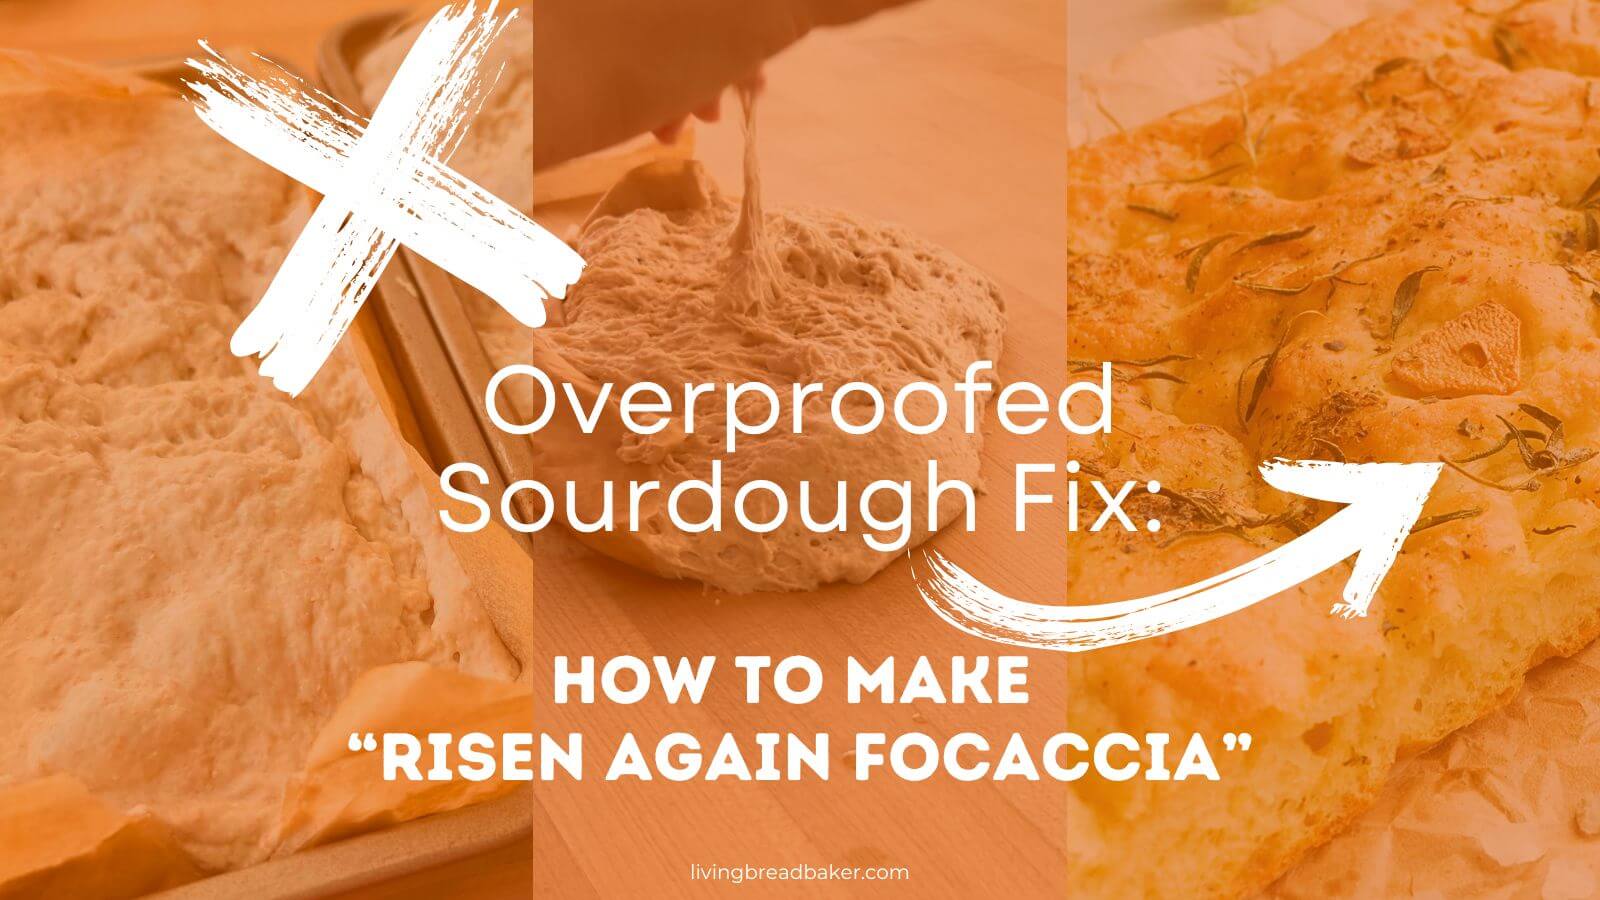
- Turn it into Focaccia: Get a casserole dish (about a 8×8-inch size) or a flat baking sheet and drizzle olive oil generously on the pan. Place your over-fermented dough into the oil and use fingers to gently spread and shape the over-proofed dough into focaccia then bake for 25-35 minutes at 450 degrees F (time may vary depending on focaccia thickness).
With sourdough, #1 can be challenging since there is more breaking down that is happening in the dough. #2 works best for slightly overproofed loaves. #3 is the best way to salvage dough that has been “ruined” by overproofing. I’ve made focaccia with dough that looked like a disaster and it was delicious!
*retardation is the baking term for slowing down the dough using a cold temperature bulk ferment or cold proof.
Learn how to turn overproofed dough into focaccia in this post: How to Turn Overproofed Sourdough into Focaccia
How to Proof Sourdough
- After the bulk ferment, shape your dough.
- Cover the dough and let the dough rise in a warm environment.
- Check the proof at the short end of the time range.
- Preheat the oven and bake.
4 Signs Your Dough is Proofed and Ready to Bake
- Dough should be 1.5 to 2 times larger in volume.
- The dough should feel full and airy, not saggy or collapsed.
- The dough should rise nearly to the top of the proofing container.
- Poke Test: Lightly press your fingertip into the dough. It should slightly rise back and leave an impression.
Surprising Tip for Good Oven Spring
Find the sweet spot by getting right up to the final proofing stage when it is just slightly underproofed.
Preheat the oven and bake. The dough will almost be completely proofed by the time the oven is preheated, causing it to bake with a showy ear or burst.
Also, for easier scoring, I recommend chilling the dough for 30 minutes in the fridge at this stage before baking.
See this post for more help on improving your bake results: Sourdough Bread: 10 Signs of a Good Bake (How-to Guide)
Great Resource to get the Right Proof
Aside from the sourdough starter, timing is the most difficult part of sourdough baking for new bakers.
I’ve created several timing templates that are done for you so you just need to fill in your starting time and work forward.
Or plan ahead by filling in the ending time and working backward.
Try a sample of the timing template: free sample of the sourdough timing worksheet
After you have reviewed this article, you have the signs to look for and a test to feel confident in getting the right proof for your next sourdough bake!
Just getting started with sourdough?
A competent guide transforms sourdough baking from overwhelming to uncomplicated and fun!
Get My Free Quick Start Sourdough Guide: Learn the key terms and concepts in sourdough baking, including the differences between active sourdough starter and sourdough discard, and how to care for your starter.
Start Baking Sourdough Confidently—Take the Intro to Sourdough Course for Just $27!
Time Planning Help for Sourdough Baking
The #1 need for sourdough bakers is help with time planning, so I created a resource for you.
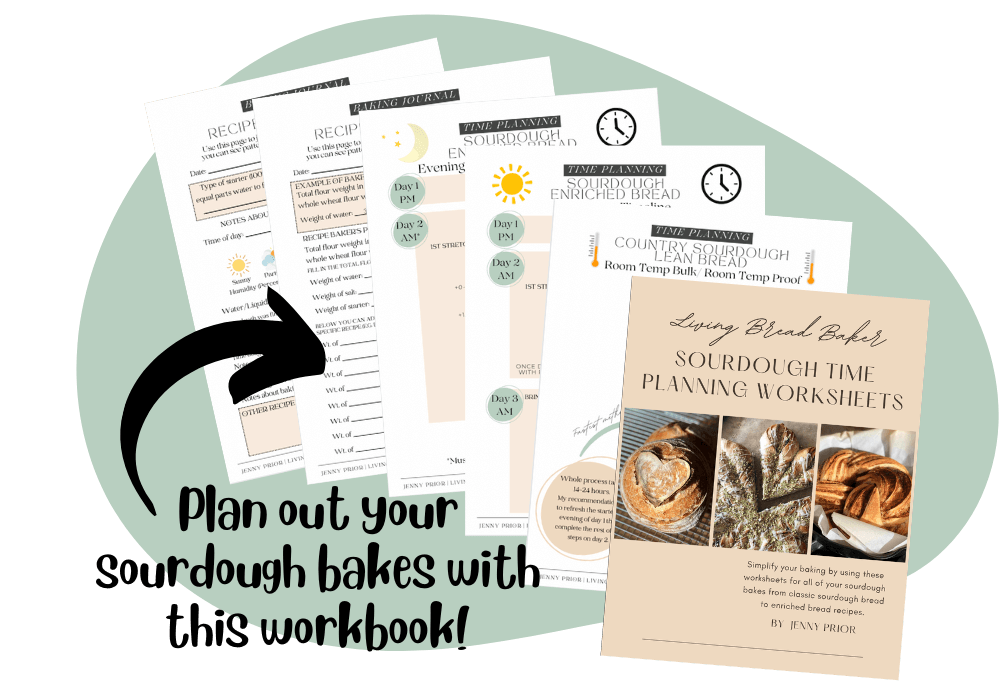
Sourdough Time Planning Workbook: Perfect for new or experienced bakers, this workbook includes 8 templates ready to fill in and a baking journal. The templates cover 4 different ways to make classic sourdough country breads, 3 time planning worksheets for enriched sourdough bread depending on serving time target, and a blank template. The baking journal goes over baker’s percentages and how to take notes on your sourdough bakes.
Get a free sample of the workbook: Use this sourdough time planning worksheet sample to simplify your baking.
Living Bread Baker posts mentioned
How to make sourdough step by step: My Classic Sourdough Country Loaf
When is my bulk ferment finished
When is sourdough finished proofing? The signs and a test
Sourdough Bread: 10 Signs of a Good Bake (How-to Guide)
Shop this post
Free Sourdough Quick Start Guide
Online Intro. to Sourdough course
This post contains affiliate links. Read my policy here.