Sourdough Bread: 10 Signs of a Good Bake (How-to Guide)
There’s nothing quite as satisfying as pulling a fresh loaf of sourdough out of the oven—but how do you know if it’s truly a great bake?
Whether you’re new to sourdough or have been baking for years, understanding the key signs of a well-baked sourdough loaf can help you refine your technique and consistently achieve delicious results.
In this guide, we’ll walk through 10 signs of a good sourdough bake—from crust color to crumb structure—so you can assess your bread with confidence. Plus, you’ll learn what each sign tells you about your process and how to improve your next bake!

10 Signs of a Good Sourdough Bake (How to Guide!)
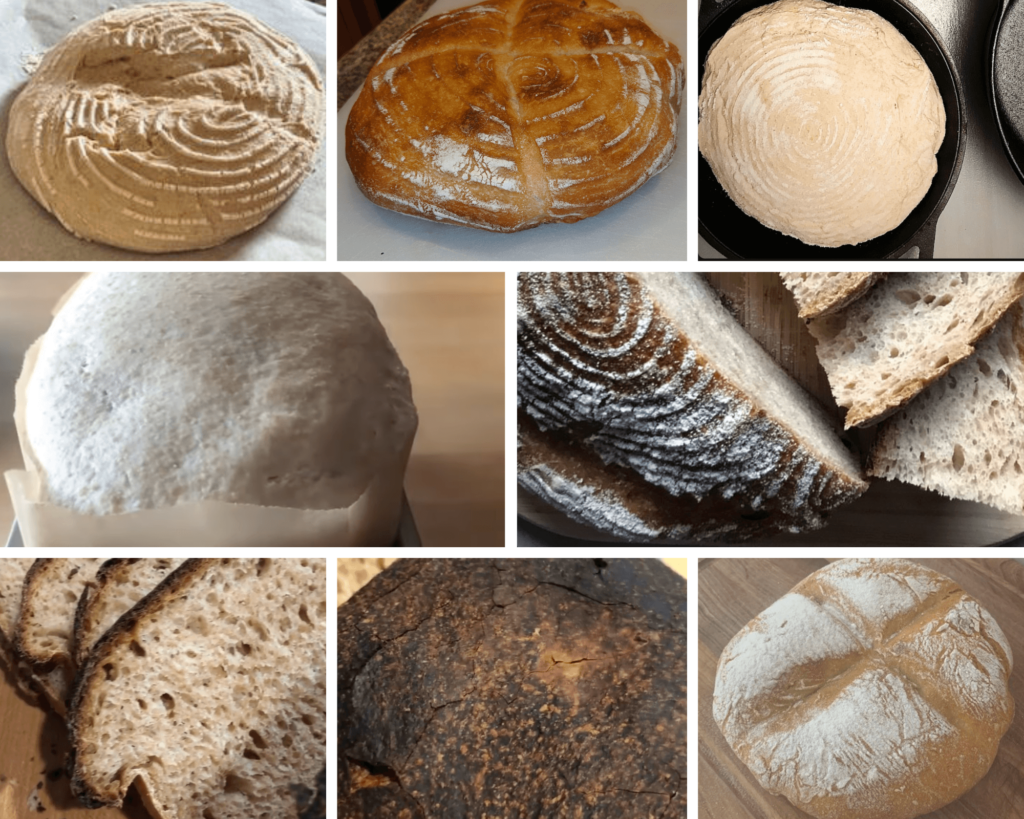
Wondering if your sourdough turned out right? A great bake isn’t just about looks—it’s about texture, aroma, and flavor too. Here are 10 key signs of a well-made loaf:
✔ A deep golden crust – but how dark is too dark?
✔ The knock test – does your loaf sound right?
✔ Good volume – fluffy inside, not dense or flat.
✔ A balanced shape – not lopsided or collapsed.
✔ Oven spring magic – is your score popping just right?
✔ That fresh-baked aroma – what does good sourdough smell like?
✔ A satin-like interior – soft but strong, never gummy.
✔ An open yet even crumb – airy but not full of tunnels.
✔ Complex, balanced flavor – no overpowering sourness.
✔ A soft but structured bite – chewy, but not tough.
Want to know exactly what each sign means—and how to fix any baking issues? Let’s break it down! ⬇
1. Crust Color
A good baked sourdough crust should be a dark golden-brown to deep brown.
The darker color happens due to a chemical reaction called the Maillard reaction in the baking process when the sugars created during fermentation are cooking at a high temperature on the outside of the dough.
This caramelization of the crust creates incredible flavor and texture. The delicious crackly crust also helps to protect the interior texture of the bread from drying out too quickly.

Troubleshooting Crust Color Issues
Pale Crust
Try one or more of these fixes:
- Check oven temperature – Use an oven thermometer to ensure proper heat. Your oven might run at a lower or higher temperature than your temperature gauge indicates.
- Bake longer – Extend baking time by 2 to 5 minutes.
- Increase exposure to heat – Remove from the pan for the final 5 minutes and use convection at the same temp for 2-4 minutes (watch closely).
Uneven Browning
Depending on the issue, one of these solutions may help:
- Adjust oven rack position – If the top is too dark, move the rack lower. If the bottom is overbrowning, move it higher.
- Use direct heat – Move bread to the rack after halfway through the bake.
Black or Burnt Spots
Consider these possible causes and solutions:
- Check placement – Avoid placing dough too close to heating elements (especially in gas ovens).
- Reduce baking time – Shorten by 4 to 10 minutes if needed.
- Ensure proper steaming – Lack of steam can cause premature crust hardening.
- Watch for overproofing – Overfermented dough can brown too quickly.
See this post to see if your dough is overproofed: What does overproofed sourdough bread (or dough) look like?
2. Hollow Sound
Here is a great sourdough party trick: testing the bottom of the loaf to see if it sounds done.
A loaf of bread that is fully baked should sound hollow when you tap the bottom of the loaf with your knuckles or a wood spoon.
If you hear a dull thud then that means the bread is underbaked and still has too much moisture caught inside.
Quick Tip: If you’re unsure, use a food thermometer. Insert it into the center of the bread. Lean sourdough breads (e.g., traditional sourdough boule, batard, baguettes) should have an internal temperature of 200 to 210° F.

3. Rise Volume
No matter whether it’s a sandwich loaf or boule, your loaf should have increase in height and expanded considerably during the baking process.
The most common mistake I see in sourdough bakes is overproofing. A good bake starts with good fermentation
This good rise shows that the dough fermented properly. It means the fermentation process created a well-developed network of strong gluten bonds to hold the air pockets in during the rising and baking processes.
How to Fix Rise Issues
Flat Loaf
A flat loaf is often caused by overproofing, weak flour, improper shaping, or high hydration. Try one or more of these fixes:
- Check proofing time – Overproofing is the most common cause. Reduce proofing time by 30 to 90 minutes.
- Use stronger flour – White bread flour or high-protein whole wheat flour creates a stronger dough. If using all-purpose or low-protein whole grain flour, shorten bulk fermentation (first rise) and proofing (final or second rise) by 30 to 90 minutes.
- Improve shaping techniques – Ensure the dough has multiple folds and tight seams before proofing to develop structure.
- Adjust hydration level – If the dough is too wet, reduce water content in the next batch or use a loaf pan to provide support.
Quick Tip: If you want to give your sourdough boule a rise boost before it bakes, you can turn the proofed dough back onto the work surface and tighten the surface tension with a bench scraper before placing it into a Dutch oven or cloche for baking.
4. Symmetrical Shape
The bread should have a balanced, even shape. A good shape for a boule is to appear like a round ball, or an egg-like shape for a batard, etc.
The overall shape of the bread should not be lopsided, spread out, or have a burst bit of bread in one spot.
If you see shape issues, this can indicate a shaping problem, proofing issue, improper scoring, or bake issue.
How to Fix Shape Issues
Lopsided Loaf
- Refine shaping techniques—make sure to do a dough rest or bench rest after preshaping and that your dough is evenly distributed in the final shaping process. For sandwich loaves, batards, and baguettes, be sure to fold a triangle into the center to avoid a “dog bone” shape. See this video post for help: How to Shape a Sourdough Sandwich Loaf
- Make sure to score well—the score isn’t just for looks, it helps the steam escape during the baking process and impacts the final shape. Use a simple score like a line straight across the length of the dough, an “X” shape, or a thin crescent along the length of the top. Blade should cut in ¼ to ½ -inch into the dough.
- Bread stuck to proofing bowl? Make sure to give your proofing bowl a generous coating of white flour or rice flour to help it release easily.
- Burst bread? If you notice a burst in your bread, despite your scoring, this can be caused by underproofing. Add 30 to 60 more minutes to the proof next time.
- Pinched bread? If your bread gets deformed from the Dutch oven you’re using, consider getting a larger pot that allows for your bread to expand without getting caught.
For a loaf that spreads out too much, check for overproofing or high hydration—see the “How to Fix Rise Issues” section for more details.
5. Ovenspring (Ear or Score Split)
The oven spring is the way the bread dough blooms during the baking process and expands where it was scored.
Ideally, the score should create a distinct, even, and symmetrical split during the bake on the top of the loaf. The score allows steam to escape in the hot oven while the bread bakes.
Some bakers love trying to create an “ear” with their bread score because it is a good indicator of ovenspring. An ear is created when the edge of the score lifts up and creates a well baked fringe flaring up along the bread.

How to Improve Ovenspring
- Adjust your proof—If your bread split beyond the score or opened up in other places, it may be underproofed and needs more time to proof properly. If your bread barely expanded where it was scored, it might be overproofed and the time should be decreased next time.
- Refrigerate your dough—For the last 30 minutes of the final proof, place your proofing dough into the fridge with plastic wrap over the top. Or do a cold proof for 6 to 10 hours in the fridge in place of a room temp proof. (Learn the differences in this post: Cold Fermentation vs Room Temperature: Which Is Better?)
- Dust the top of the dough with flour before scoring—This light dusting (especially when combined with a chilled dough, see above) helps the razor blade of the bread lame cut into the dough better when scoring.
- Use a fresh razor blade—Make sure you replace your blade for the best score on your dough.
- Improve score technique—Combined with the tips above, try scoring at an angle and about ¼ inch deep to create a better oven spring and to get a better sourdough ear.
6. Aroma
A good loaf of sourdough bread should have a mouthwatering smell. The smell should be nutty, tangy, mildly sweet.
There is a distinct smell of fresh baked bread that many people may recognize, but sourdough loaves have more depth and layers. There is often a hint of the smell of the sourdough starter that was used.
If the aroma doesn’t have that nuance of tang and complexity, but just smells floury and vaguely bread-y, it indicates that it wasn’t fermented properly.
Lacking the “Sourdough Smell”
- Review your fermentation timeline—Most lean sourdough bread dough needs 5-7 hours at room temperature for the bulk ferment.
- Check your starter—Is your starter healthy? Is it rising after refreshing? Does it have a pleasant ripe fruit, yeast smell when its active?
7. Satin-Like Interior
A great sourdough bread has a slighty glossy crumb inside the bread. The crumb isn’t dry, cakey, or gummy.
A closer look at some of the best loaves of sourdough bread will reveal this subtle sheen on the crumb.
This soft, shiny interior shows that the dough fermented properly and didn’t overbake.
Fixing Interior Texture Issues
Dry interior
- Reduce the bake time by 5 minutes—a dry interior is likely caused by overbaking.
- Check hydration—dryness in the crumb may also be caused by too little hydration. If you are using cup measurements instead of weighing your ingredients, check to make sure you aren’t overpacking your flour. For weight measurements, increase hydration by 1 to 3%.
Gummy interior
- Increase bake time—a gummy interior may be caused by underbaking. Add 3-5 minutes to bake time. You can always check the interior temperature to see if a loaf is done baking, it should be at least 200° F for a lean bread.
- Check fermentation timeline—if the bread has not fermented enough, it doesn’t have good gluten structure and gas accumulation to bake properly.
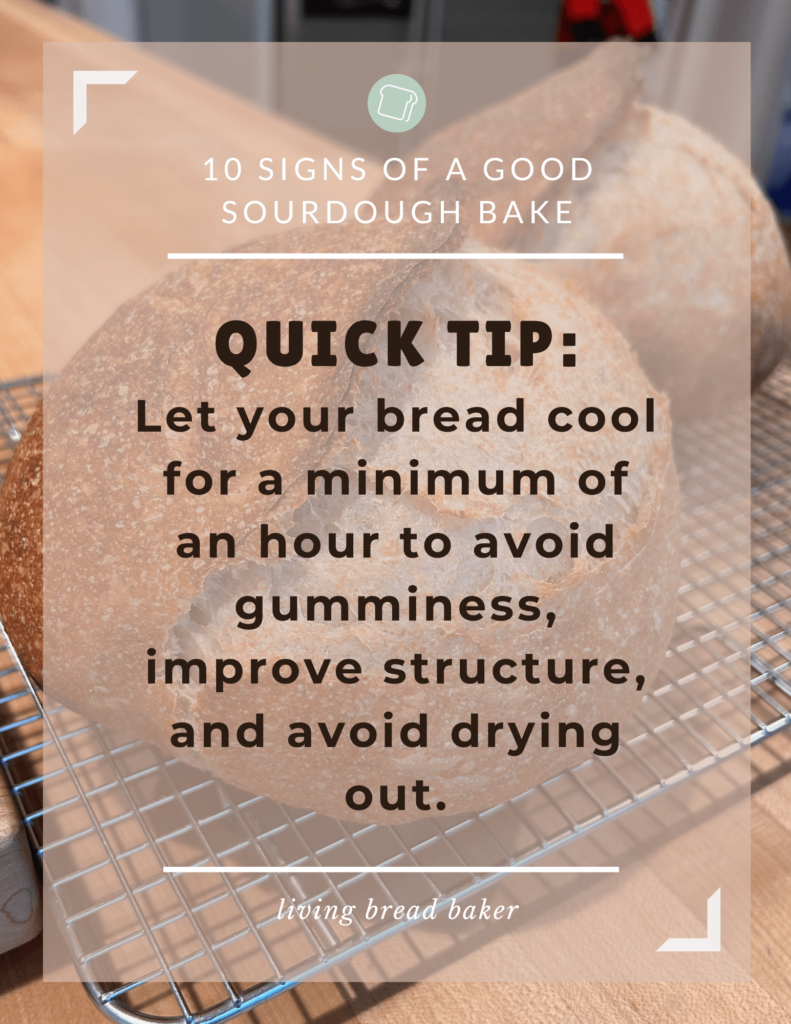
- Let the bread cool—if the bread is cut too soon after baking, this doesn’t allow the baking stage to complete as the bread cools and the residual steam evaporates and the interior structure solidifies.
- For more help on fixing issues with gumminess, see this post.
Quick Tip: Let your bread cool for a minimum of an hour.
I understand if you can’t wait that long! Try 30 minutes if you are enjoying the bread with dinner. However, if you are baking bread that you want to last for a few days, then let it cool for at least an hour and ideally overnight for easy slicing.
Dense, Cake-Like interior
If you notice a dense, cakey crumb inside your bread it is likely caused by one of two factors, or a combination: too low hydration and/or underproofed. Try one or more of these tips:
- Extend the final rise—If your bread is dense inside, it is likely underproofed. Extend the proofing stage or final rise by 30 to 60 minutes. See this post to learn the signs of dough that is finished proofing: When is sourdough finished proofing? The signs and a test
- Judge your dough—If you are working with your dough and it seems too dry even after mixing and an initial 20-30 minute autolyze, then it likely needs more water added. A dry dough could be a measurement error (e.g. misjudging a cup of flour, grams to cup conversion or vice versa) or a difference in flour absorption which is very common with whole grain flour variations. For dry dough, add water 1 T. or 10 grams at a time, fold in, and wait about 5 minutes to feel if texture has improved.
Quick Tip: Stick with one sourdough recipe if you are a beginner. Switching from recipe to recipe will increase confusion and won’t help you hone your skills by improving with repeated experience.
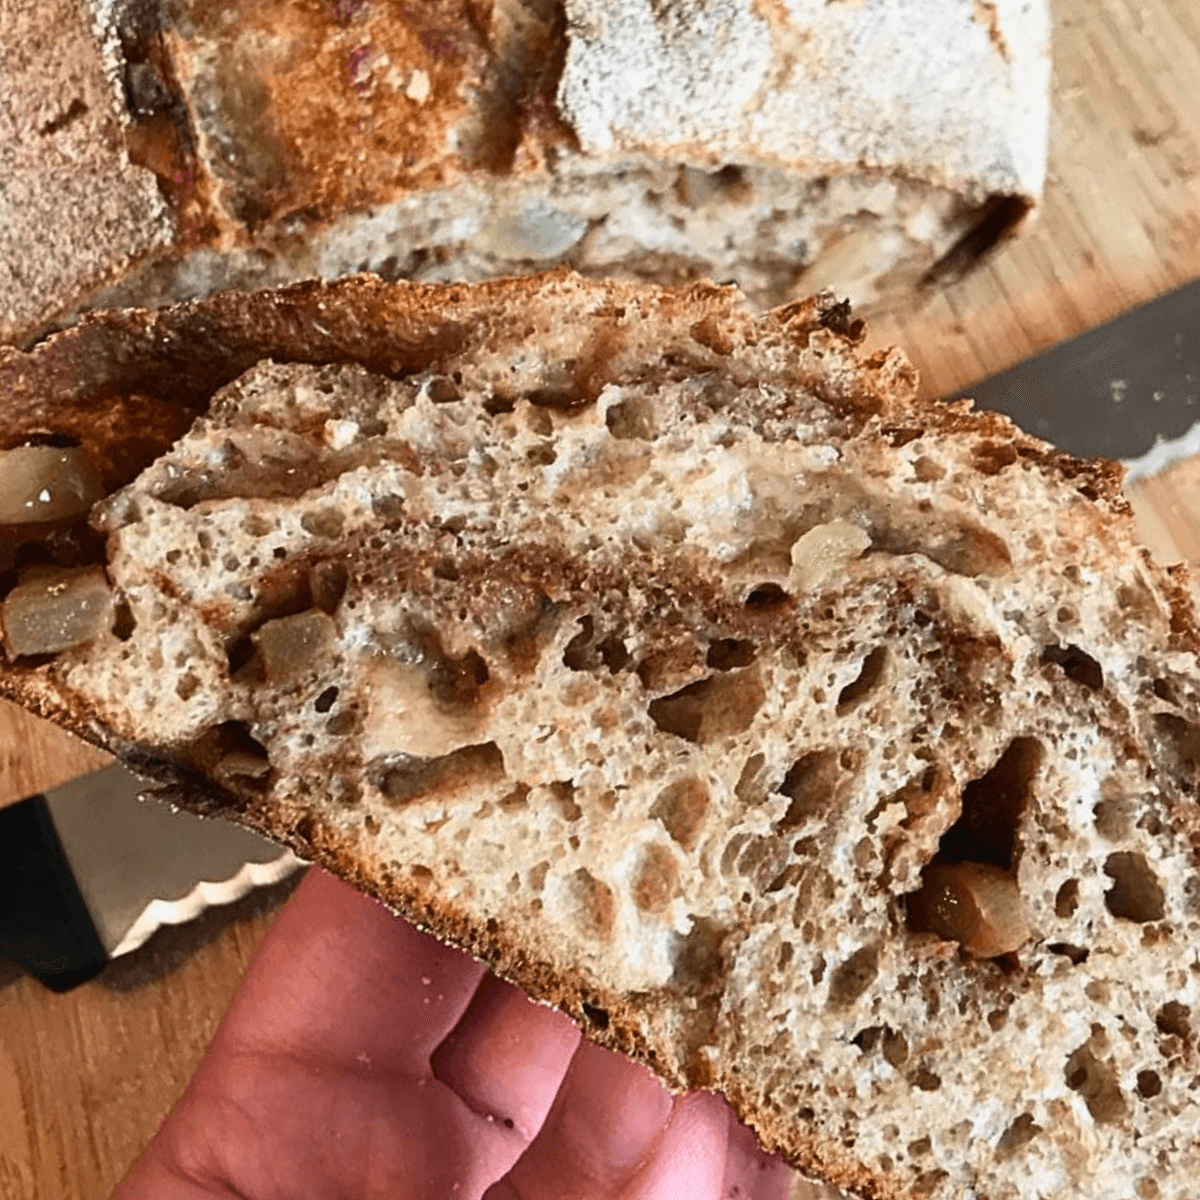
8. Even Crumb
A good sourdough bread should reveal well-distributed air pockets inside the bread when cut open.
There shouldn’t be dense portions alongside “big caves”. The pattern of crumb should be consistent.
When the bread is cut in half and you press down on the top of one half of the loaf, it should press down easily and then rise back to its original shape.
These signs indicate proper fermentation, dough development, and baking technique.
In the section below, you’ll find some tips to improve your bread’s crumb.
How to Improve the Crumb of Your Bread
- Proper flour—Use strong bread flour which has a higher gluten protein percentage in your sourdough recipes. This helps improve the strength of the dough and final structure of the bread.
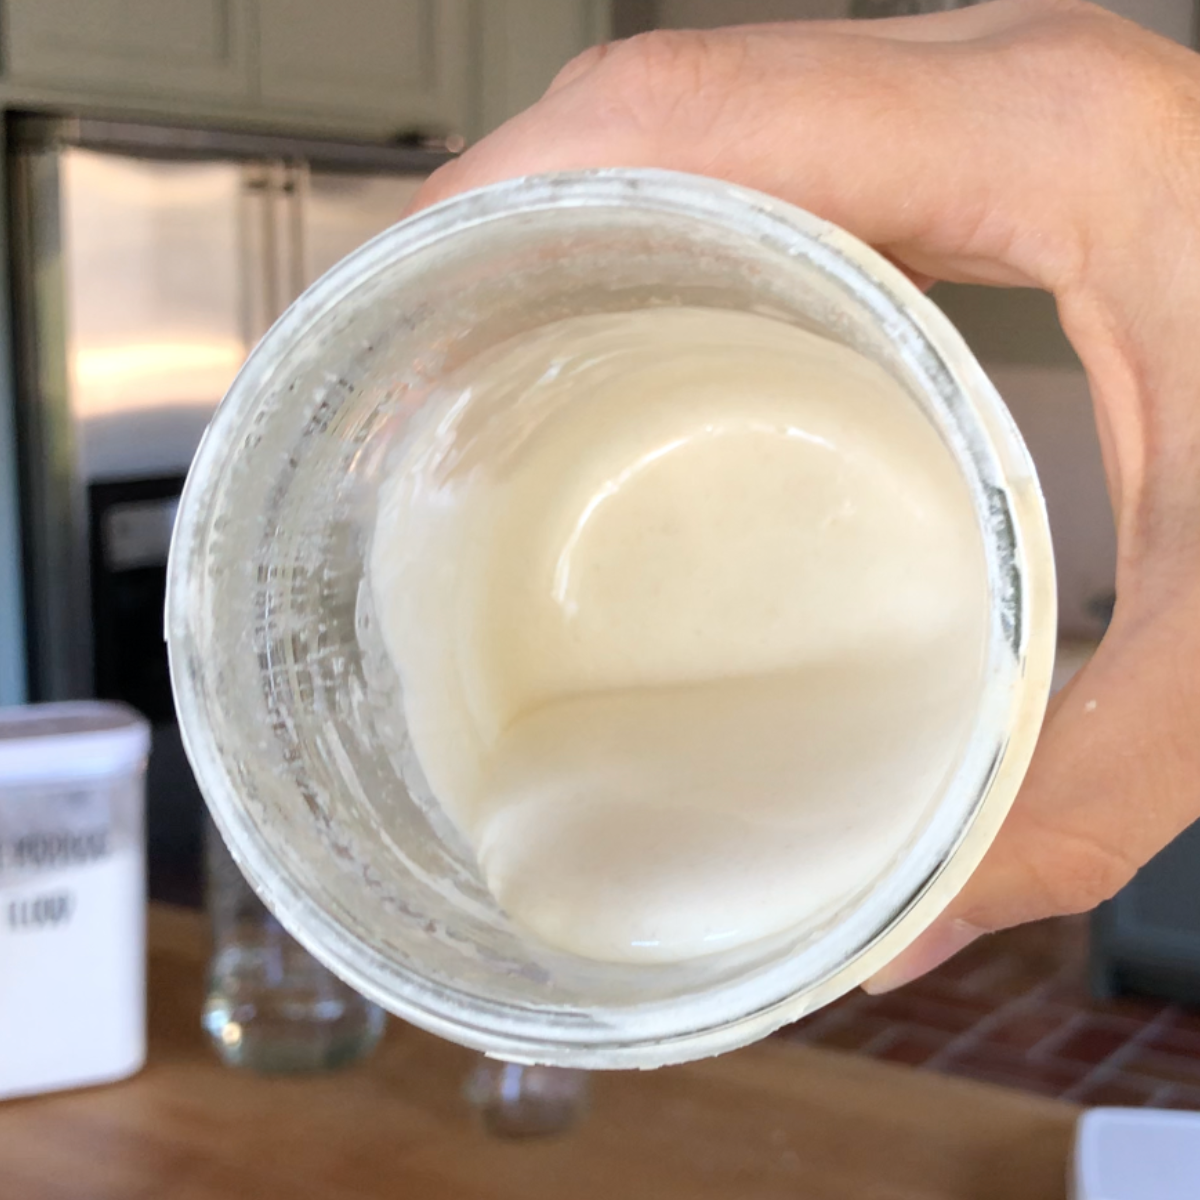
- Starter strength—Make sure to use a strong active starter. See this post for learning how to evaluate when your starter is active enough: How to Know When your Sourdough Starter is Ready (8 signs)
- Autolyse without starter—In repeated tests, I’ve seen a difference from mixing water and flour together and letting it autolyze without the starter or salt for at least 20 minutes. This jumpstarts the dough development and creates a softer, more open crumb in the final bread.
- Stretch and folds—Doing 1-4 sets of stretch and folds at 20-30 minute intervals in the beginning of the first rise (bulk ferment) helps the dough develop strength and elasticity.
- Consistent fermentation—Good fermentation creates good bread. Make sure you follow the recipe’s fermentation guidelines, and if you need to slow your dough down, put it in the fridge to slow fermentation. Check out my posts on bulk fermentation and proofing to learn what to look for.
- Steamy bake—Make sure you are using steam in the first half of your bake by using a Dutch oven or a manual steam method.
9. Flavor
Sourdough bread can range in flavor from a strong sour tang that makes you salivate to a nuanced acidic sweet flavor.
There should be these different notes of flavor that bring more depth than a bread made with standard commercial yeast which usually tastes of yeast and flour.
How to Improve the Flavor of your Sourdough Bread
- More Sour Sourdough—For a sourdough bread that tastes more sour like the traditional San Francisco sourdough variety, extend the room temperature bulk ferment to a range of 7 to 10 hours. Refer to this guide to make sure you don’t overferment: How to tell when sourdough is done with bulk fermentation
- Complex, Layered Flavor—Use cold fermentation. 24-48 hours in the fridge for bulk ferment and 8-12 hours in the fridge for cold proof. This post explains the impact of fermentation temperature on flavor: Cold Fermentation vs Room Temperature: Which Is Better?
- Subtly Sweet French Flavor—Try a stiff sourdough starter to bring out more of the acidic and sweet flavors of the dough. See this post to learn more: Stiff Sourdough Starter vs Liquid 100% Hydration

10. Soft Bite
When you bite into sourdough bread, it should be a soft and easy-to-chew.
It shouldn’t be gummy, dense, or too dry. The outer crust should be thin and crisp with a crumb that is pillowy and you can bite into easily.
The hydration of the dough and the fermentation have big impacts on the texture of the bread, but creating a steamy, high heat environment for the bake is key to finishing well. The right baking conditions will help your bread expand in the oven, develop a soft crumb and thin, crisp crust.
Quick Tip: Make sure to get your home oven very hot and very steamy for lean sourdough bread. High heat, high steam for the first part of the bake. Then, high heat without steam for the final part of the bake. But avoid overbaking your bread.
How to Improve Your Sourdough Results
Evaluating these 10 signs of a great sourdough bake and learning how to troubleshoot each one will help you improve your future sourdough bread baking results.
If you want to continue improving your results and remember what is working for you, the best way is to begin taking notes and journaling your bakes.
Note the date, recipe, time of year, temperature of your kitchen, how long it fermented, results and more! If you need a resource, I have a sourdough baker’s journal in my Sourdough Time Planning Workbook with done-for-you sourdough journal entries to record the most essential details.
Journaling will help you improve as a baker faster and help you appreciate how far you’ve come in your sourdough journey!
Recipes to Try to Make the Best Sourdough Bread
Baking regularly is the best practice.
Here are some of my favorite sourdough recipes that are easy variations of a country loaf.
- The Best Sourdough Recipe for beginners: How to make Sourdough Bread step by step
- Sourdough Apple Cinnamon Spice Country Bread (Boule) Recipe
- Jalapeño Cheddar Sourdough Bread Recipe (Cheesy Crust)
- How to Make Cute Pumpkin Shaped Sourdough Bread Boules
- Sourdough Sandwich Loaf

Your Key Takeaway
I’d love to hear what your key takeaway or most helpful tip in this post was! Let me know in the comments if something was helpful or if you have a question.
I can’t wait to hear how these tips went for your next loaf of sourdough.
Please share this link with a sourdough friend if you enjoyed it!
Just getting started with sourdough?
A competent guide transforms sourdough baking from overwhelming to uncomplicated and fun!
Get My Free Quick Start Sourdough Guide: Learn the key terms and concepts in sourdough baking, including the differences between active sourdough starter and sourdough discard, and how to care for your starter.
Start Baking Sourdough Confidently—Take the Intro to Sourdough Course for Just $27!

Time Planning Help for Sourdough Baking
The #1 need for sourdough bakers is help with time planning, so I created a resource for you.
Sourdough Time Planning Workbook: Perfect for new or experienced bakers, this workbook includes 8 templates ready to fill in and a baking journal. The templates cover 4 different ways to make classic sourdough country breads, 3 time planning worksheets for enriched sourdough bread depending on serving time target, and a blank template. The baking journal goes over baker’s percentages and how to take notes on your sourdough bakes.
Get a free sample of the workbook: Use this sourdough time planning worksheet sample to simplify your baking.

Living Bread Baker posts mentioned
When is sourdough bulk fermentation finished?
When is sourdough finished proofing?
How to Know When your Sourdough Starter is Ready (8 signs)
How to make Sourdough Bread step by step
Cold Fermentation vs Room Temperature: Which Is Better?
Sourdough Apple Cinnamon Spice Country Bread (Boule) Recipe
Jalapeño Cheddar Sourdough Bread Recipe (Cheesy Crust)
How to Make Cute Pumpkin Shaped Sourdough Bread Boules
Shop this post
FREE Sourdough Quick Start Guide
Sourdough Time Planning Workbook & Baking Journal
My Intro. to Sourdough online course
This post contains affiliate links. Read my policy here.


“There shouldn’t be dense portions alongside “big caves”. The pattern of crumb should be consistent.”
You mentioned this problem but I didn’t see were you said what causes this. Since finding your site I’ve baked dozens of loaves and every now and then I get giant ‘caves’ in the loaf. I have not been able to pin down the the cause yet. I’d say 90% of my loaves turn out great, good color, nice crumb and chew, and even a nice ‘ear’ (didn’t know that was a good thing until reading this article)! Any insight would be greatly appreciated. Thanks.
Hi Doug! Thank you for reading. The two most common causes for the “big caves” I’ve noticed are either overproofing or not scoring well. Overproofing can impact the interior structure causing gluten networks to collapse while baking. If the dough is not scored well enough (either not deep enough, wide enough, or skipped altogether), the steam can begin to accumulate in one part of the dough while it bakes creating a big cave if it cannot break through the crust. I hope that helps!