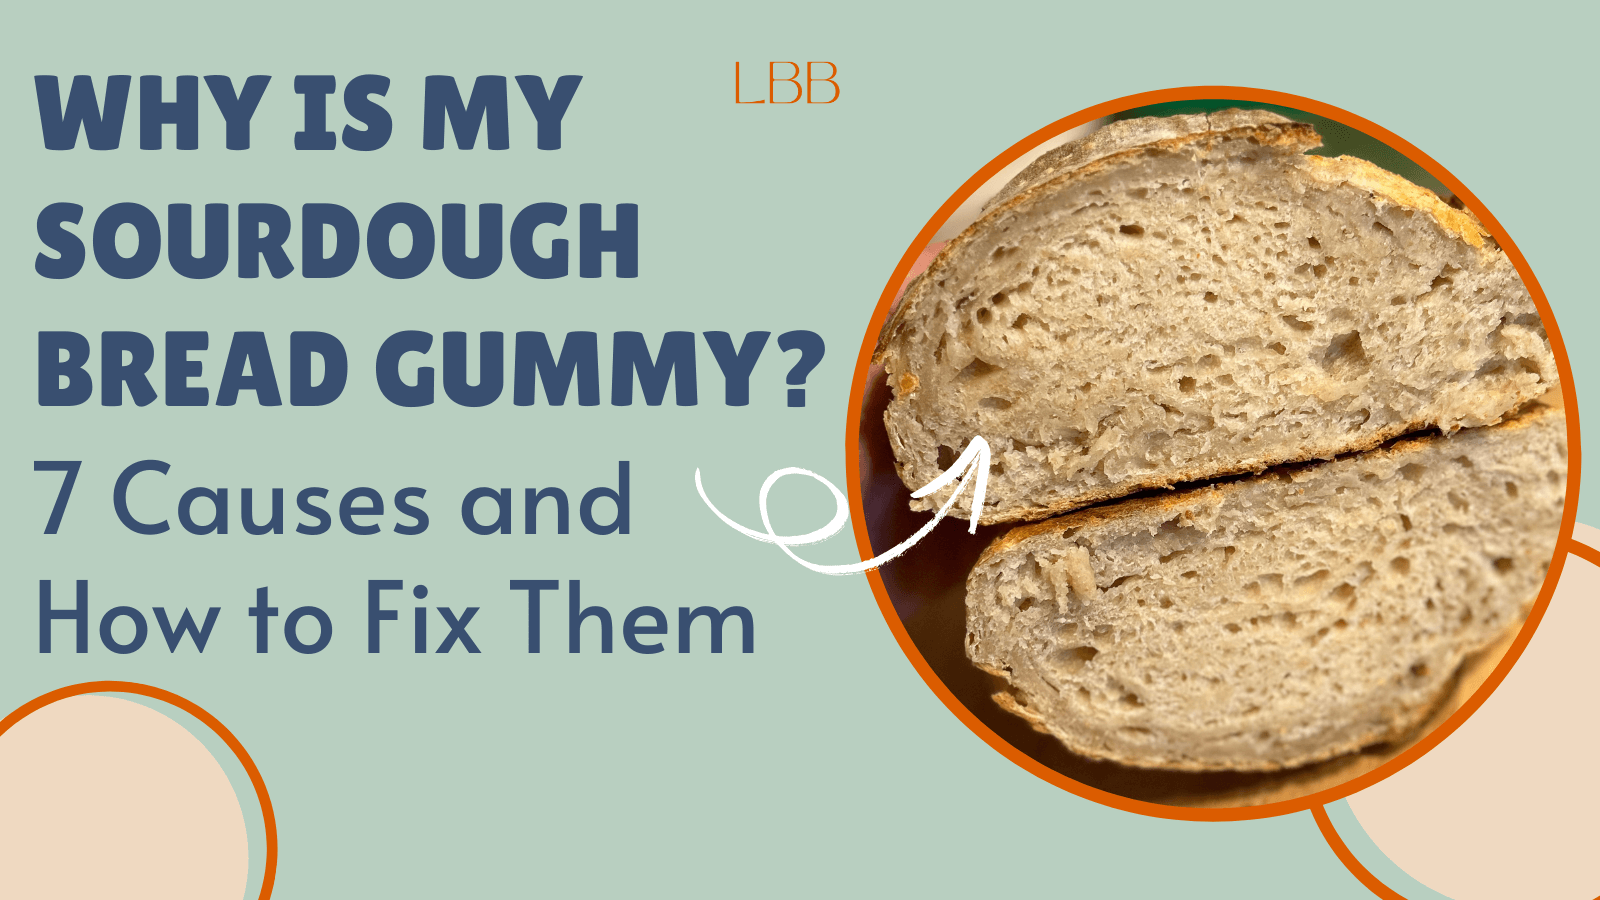
Why Is My Sourdough Bread Gummy? 7 Causes and How to Fix Them
Sourdough bread is known for its chewy texture, crisp crust, and delicious flavor. However, a common issue many bakers face is gummy sourdough bread.
If you’ve ever sliced into a loaf only to find a dense, sticky, or undercooked crumb, you’re not alone.
Let’s break down the most common mistakes that lead to a gummy crumb and how to fix them next time for a delicious loaf of sourdough bread.
What is Gummy Sourdough Bread?
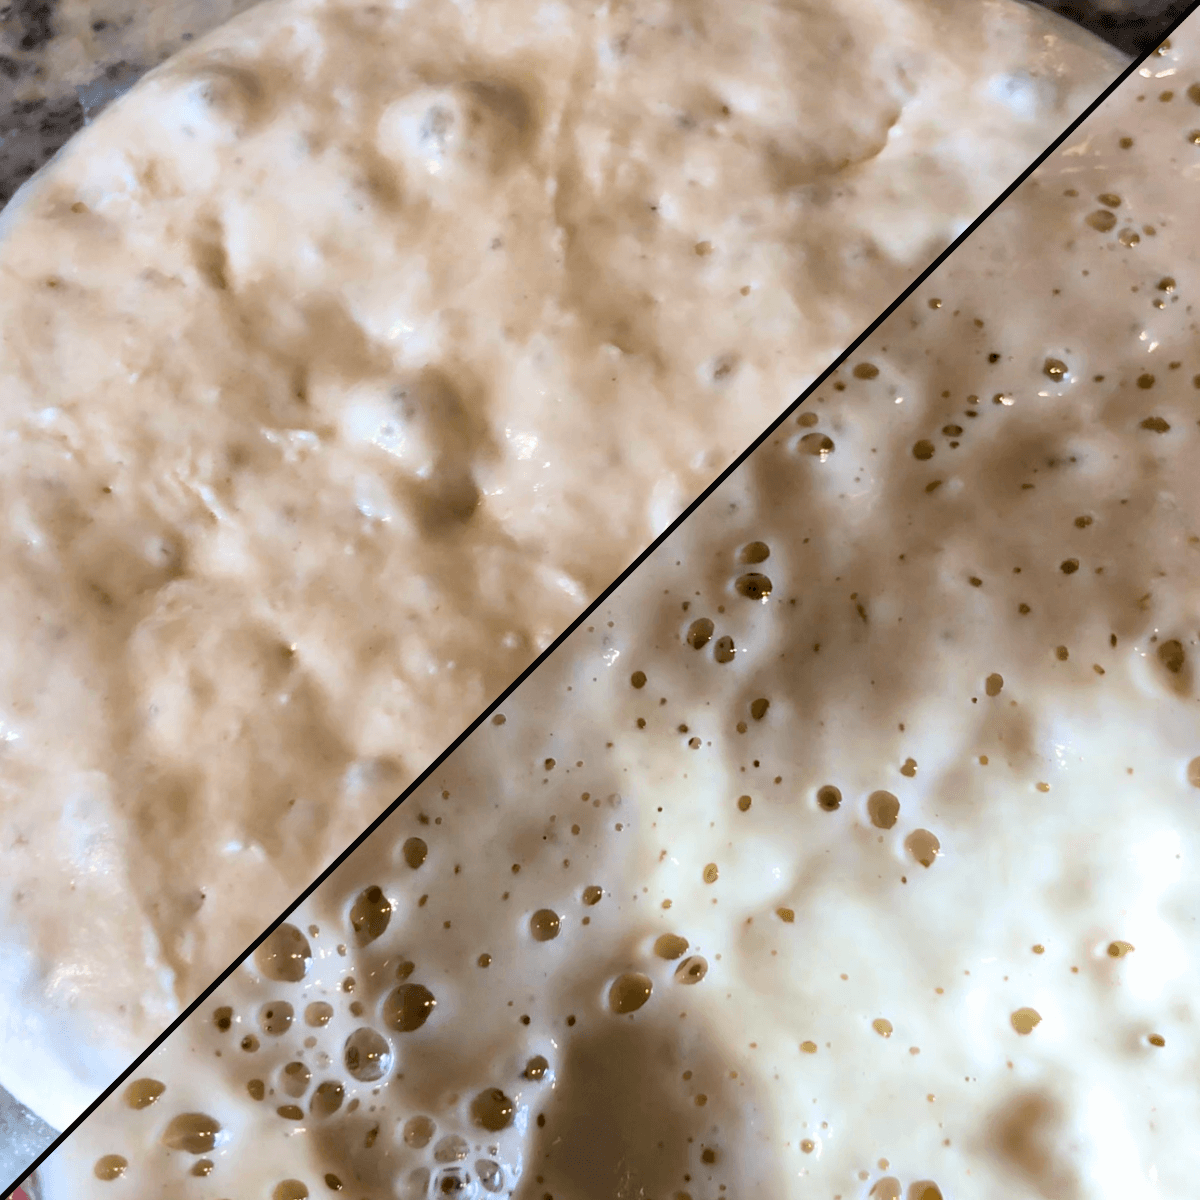
If you cut into your sourdough loaf and find the interior—known as the crumb—sticky, wet-looking, dense, or darker than expected, you’re dealing with gummy sourdough bread.
This gumminess might appear in just a few spots, the center, or throughout the entire loaf. The name fits because when you take a bite, the texture is excessively chewy—almost like gum.
The good news? Gummy sourdough is preventable! Below, I’ll walk you through 7 common causes and how to fix them, so you can achieve a perfectly baked loaf every time.
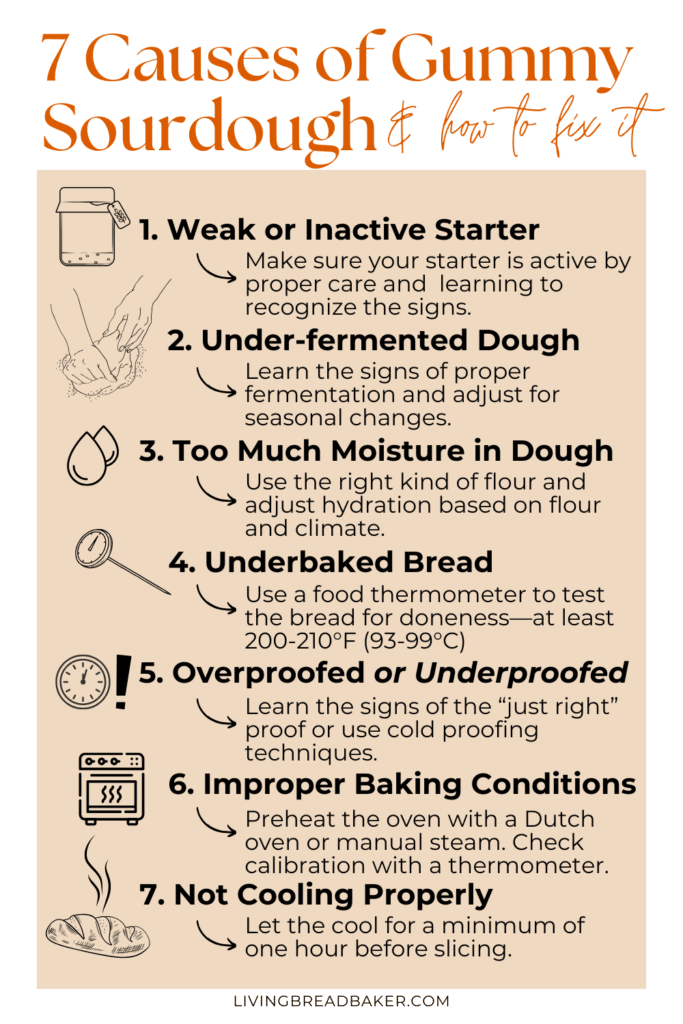
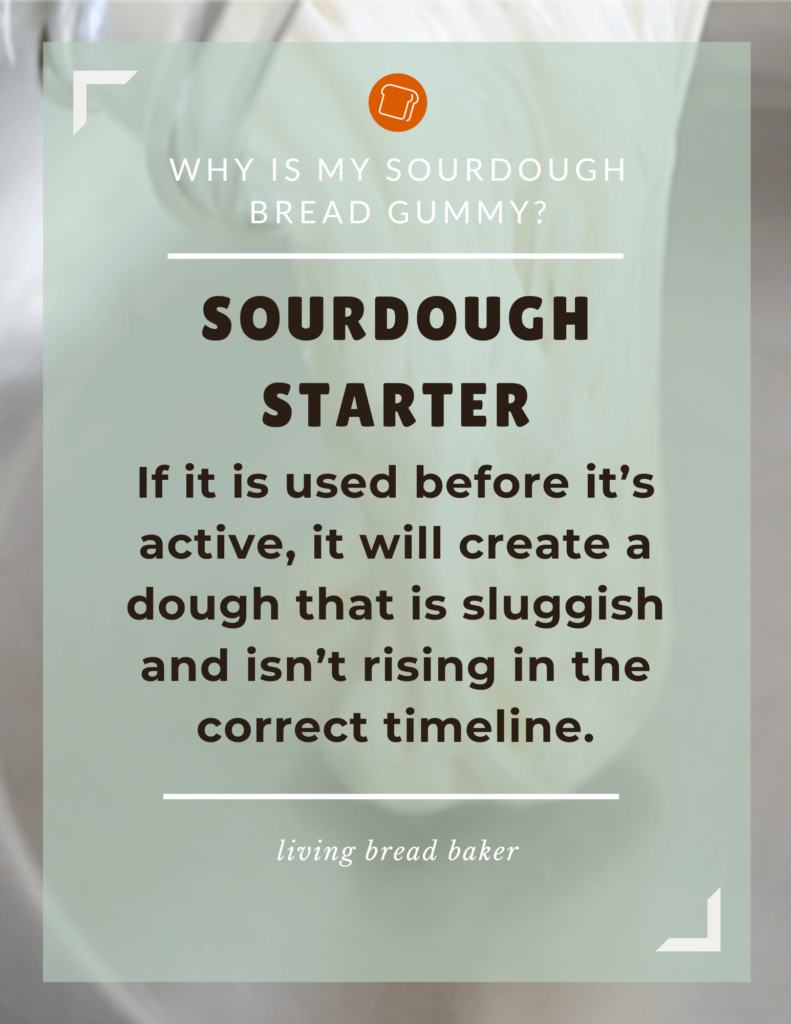
1. Weak or Inactive Sourdough Starter
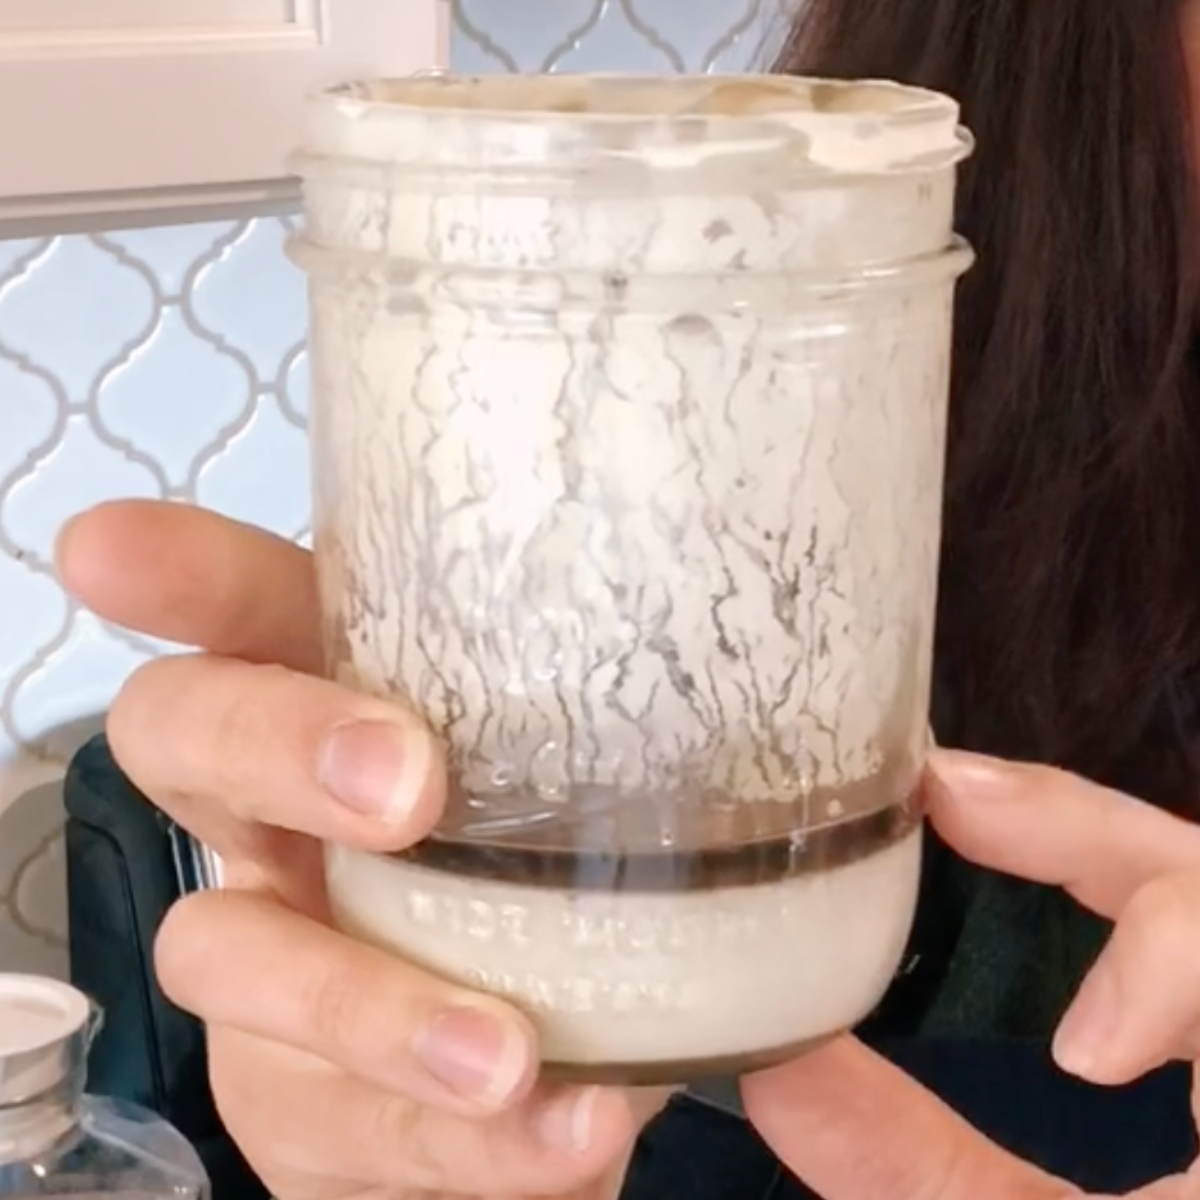
In sourdough baking, starter care is key to great bread and long-term sourdough success.
The sourdough starter should be active and healthy to give dough the best rise and development.
If it is used before it’s active, it will create a dough that is sluggish and isn’t rising in the correct timeline.
Fix:
- Ensure your sourdough starter is active and bubbly before mixing your dough. A good sign is that it doubles in size within 6-12 hours at room temperature. It should have lots of bubbles. Read this article to learn the 8 signs to Know When your Sourdough Starter is Ready.
- A sourdough starter should be refreshed (not just feeding) daily if left at room temperature or at least once each week if stored in the fridge for maintenance. Learn about refreshing your starter in this article.
- If you, like me, store your starter in the fridge when you aren’t baking for a few days, make sure to refresh it at room temperature at least two times before using it in dough.
- You can use a rubber band to track your starter’s rise so you can assess that it has doubled before baking.
2. Under-Fermented Dough
One of the most important things in sourdough baking is the fermentation process.
If the dough’s first rise (bulk fermentation) is too short, you may end up with a gummy texture.
The wild yeast needs time to fill the dough with pockets of carbon dioxide and the gluten needs time to develop a strong, elastic dough. Without the necessary time, the dough will be dense, bulky, and difficult to shape.
Fix:
- Allow for a longer bulk fermentation, keeping in mind that ambient temperature affects fermentation. A warmer spot will speed things up, while a cool place slows it down.
- Most classic lean sourdough recipes take 5 to 7 hours to rise at room temperature. A cold bulk ferment takes 24-72 hours. Learn about cold fermentation in this article.
- Assess the dough’s volume, texture, and appearance to judge whether it is done with bulk fermentation before shaping.
3. Too Much Moisture in the Dough
Using too much water or baking in a humid environment can lead to a wet dough, which results in a dense, gummy loaf.
This can be especially true when using weaker flour varieties. See the fixes below to have a better bake next time!
Fix:
- Reduce the amount of water if your dough feels overly sticky. Whole grain flours absorb more water, while white bread flour needs less.
- Adjust hydration based on your flour’s protein content. Higher-protein flour (such as bread flour) can handle more water, while all-purpose flour requires less.
- If you’re using a stand mixer, be careful not to overmix, as this can break down gluten and weaken structure. Mix dough on the lowest two speeds with a dough hook attachment and stop when the flour is just mixed in then check the dough by hand.
- Use a kitchen scale to measure accurately. Cup measurements can be less accurate, leading to issues with the hydration ratio.
- Learn more about how flour works and different varieties in this post: Sourdough Guide to Flour: Types, Storage, & Tips
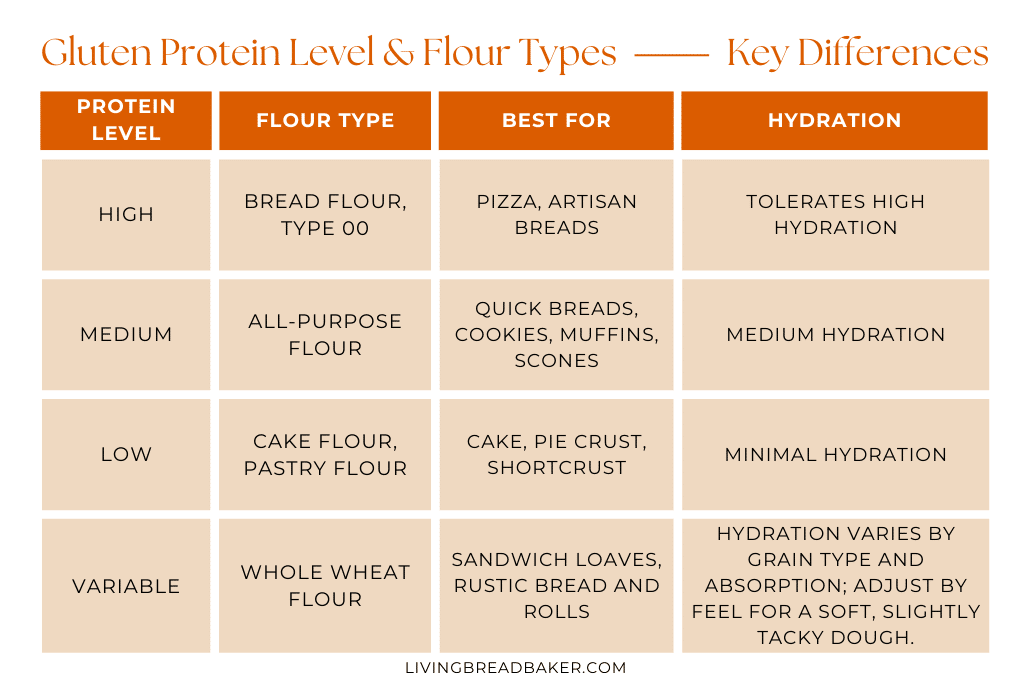
Flour Type and Hydration
Gluten is the protein in flour that gives dough its structure, stretch, and strength. The type of flour you use directly affects how much water (or other liquid) the dough can handle.
Think of gluten proteins as tiny bridges—if too much water is added, those bridges collapse, resulting in a weak or gummy dough.
The protein content in flour varies by type:
- High-protein flours like bread flour and Type 00 flour can absorb more water, making them ideal for high-hydration doughs.
- Medium-protein flours like all-purpose flour have a moderate water tolerance and may require less liquid to maintain structure.
- Whole wheat flour tends to absorb more water due to its bran and fiber content, but its behavior can vary widely due to the diversity in whole grains.
Choosing the right flour and adjusting hydration accordingly is key to achieving the perfect dough consistency. See this post to learn more.
Special Location Notes: Humidity and Elevation
Environmental factors like humidity and elevation can greatly impact sourdough baking.
High Humidity:
- Dough absorbs moisture from the air, making it stickier and harder to handle. Make adjustments to your dough based on how it is feeling after mixing and the first stretch and fold by adding more flour if it feels too wet. Or search specifically for high humidity sourdough bread recipes.
- Reduce the amount of water in your recipe slightly and use a kitchen towel or plastic bag to cover the dough instead of airtight lids to prevent excess moisture buildup.
- Increase flour dusting when shaping to prevent sticking.
High Elevation (Above 3,000 Feet):
- Faster fermentation due to lower air pressure can lead to overproofing. Reduce the amount of starter by 20% (e.g. use 80g starter in a recipe that calls for 100g) or shorten bulk fermentation time.
- Liquids evaporate more quickly at high altitudes, so dough may dry out faster. Use a slightly wetter dough or proof in a humid environment.
- The more rapid evaporation causes issues during baking, so bake your lean sourdough breads 25°F (14°C) hotter than directed for 5-10 minutes less time.
- Baking times may be shorter, so check your loaf earlier and adjust as needed.
4. Underbaked Bread (Internal Temperature Too Low)
A loaf of sourdough bread that isn’t fully baked will retain too much moisture, leading to a gummy crumb.
The baking process is how the water in the dough heats up inside the dough, creates steam, and escapes leaving behind a beautiful bake.
If this process doesn’t complete, the moisture left in the dough creates a gummy texture. Therefore, many bakers do the “knock test” on the bottom of the loaf to listen for a hollow open sound. Whereas, an underbaked bread will have a dull thud sound from all the moisture still in the center.
Fix:
- Use a baking stone or a preheated Dutch oven for better oven spring and even baking.
- Make sure your oven is calibrated to the correct temperature with an oven thermometer.
- Bake until the internal temperature reaches at least 200-210°F (93-99°C) for a fully cooked crumb. Use a meat thermometer and insert into the center of the bread to test.
- Extend the baking time if your loaf feels too soft or wet after the suggested time period.
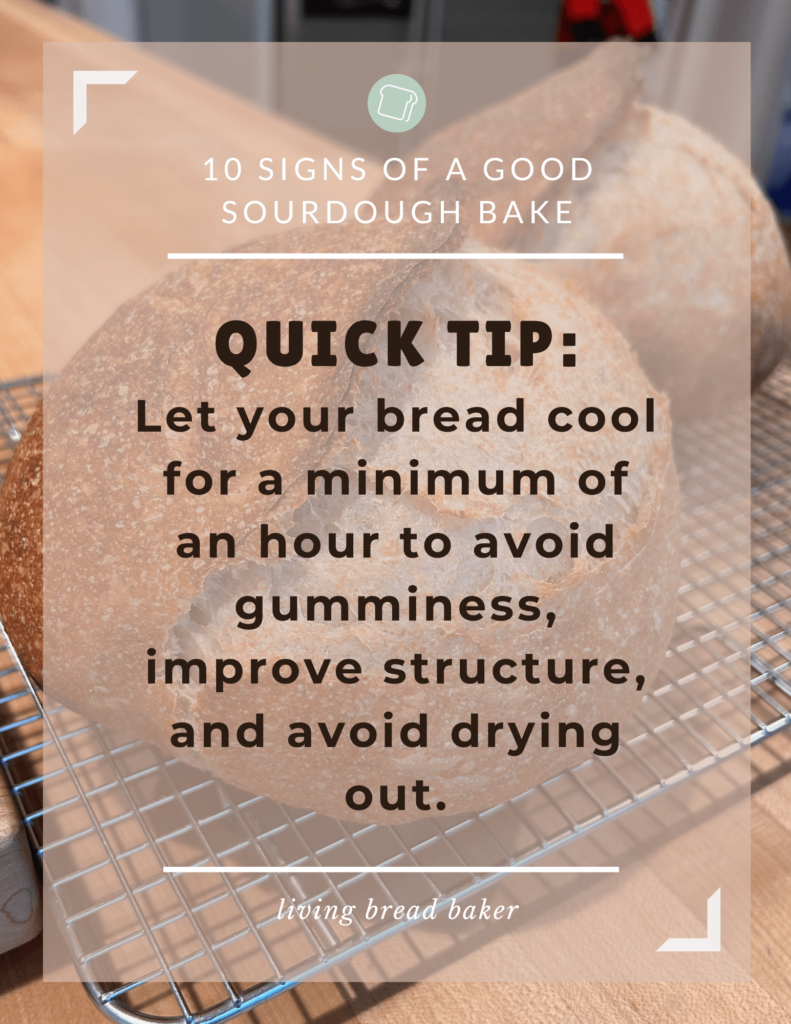
- Avoid cutting into fresh bread too soon! Let the bread cool completely on a wire rack for at least an hour. See notes on cooling in section 7 below.
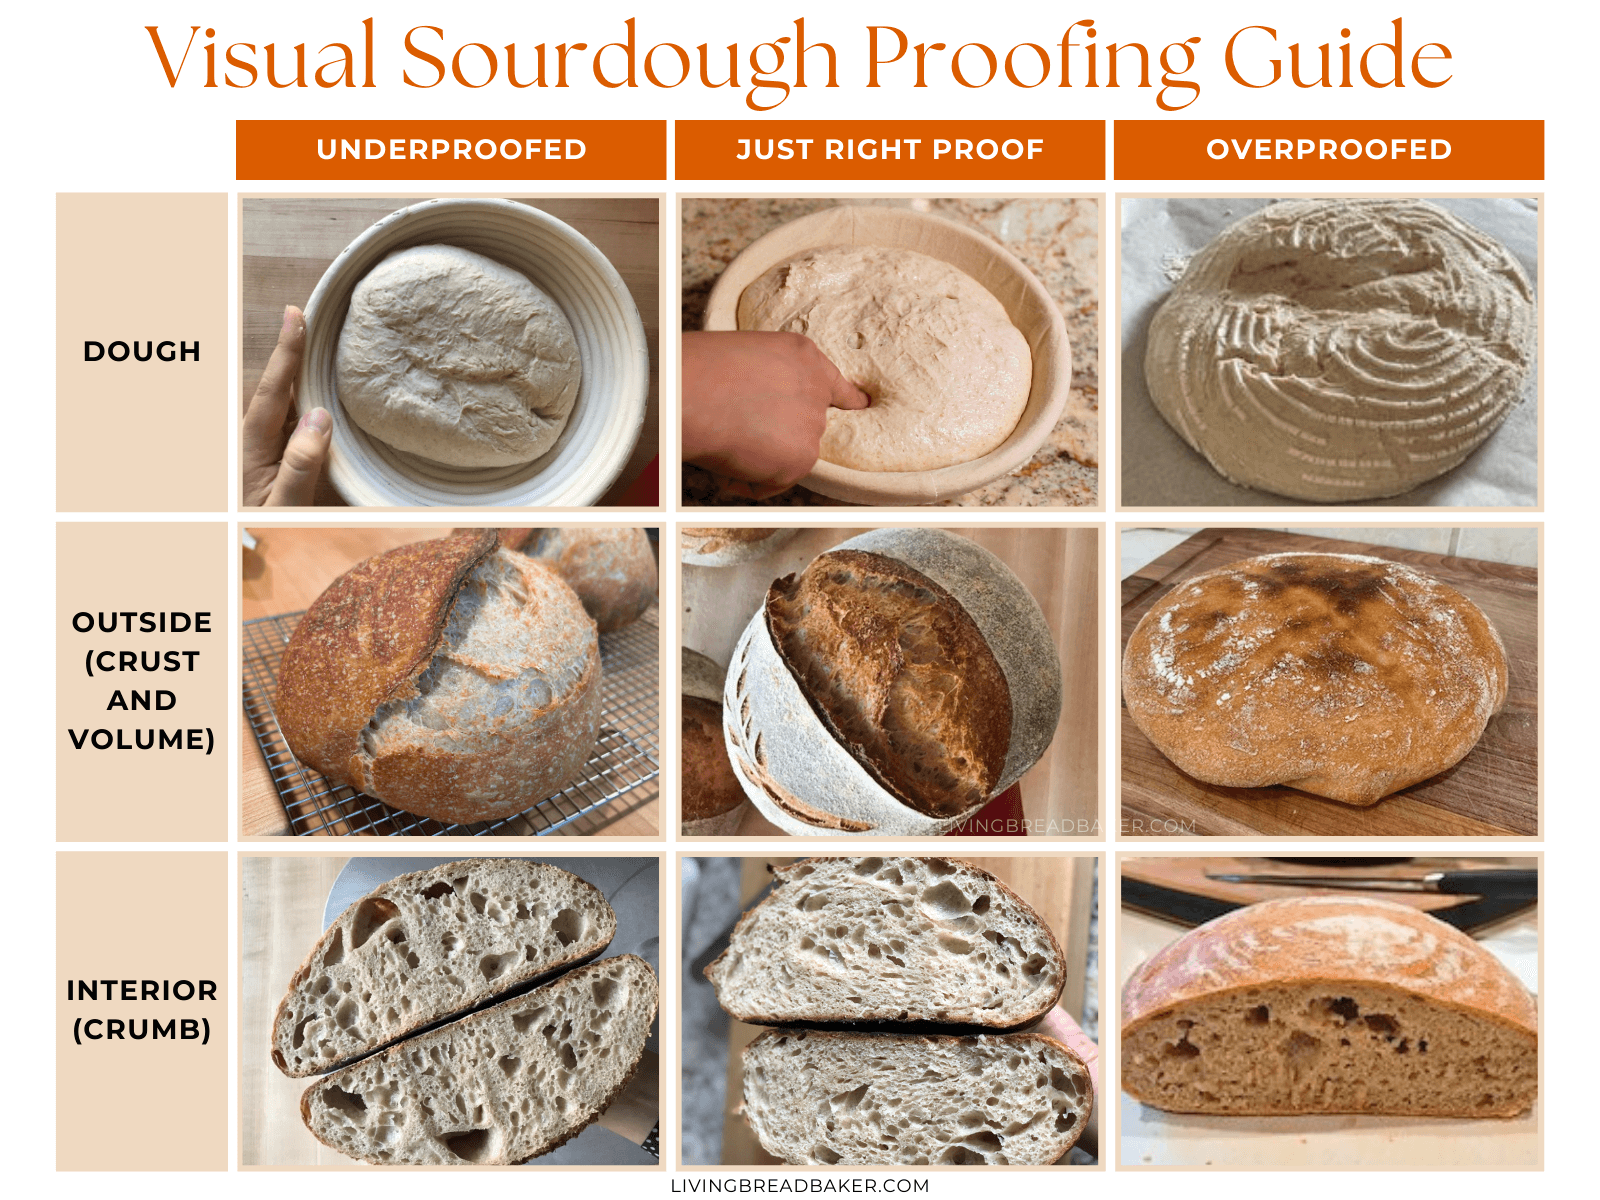
5. Overproofed or Underproofed Dough
If your bread dough doesn’t have enough gas due to underproofing it may not rise properly and can become dense and gummy.
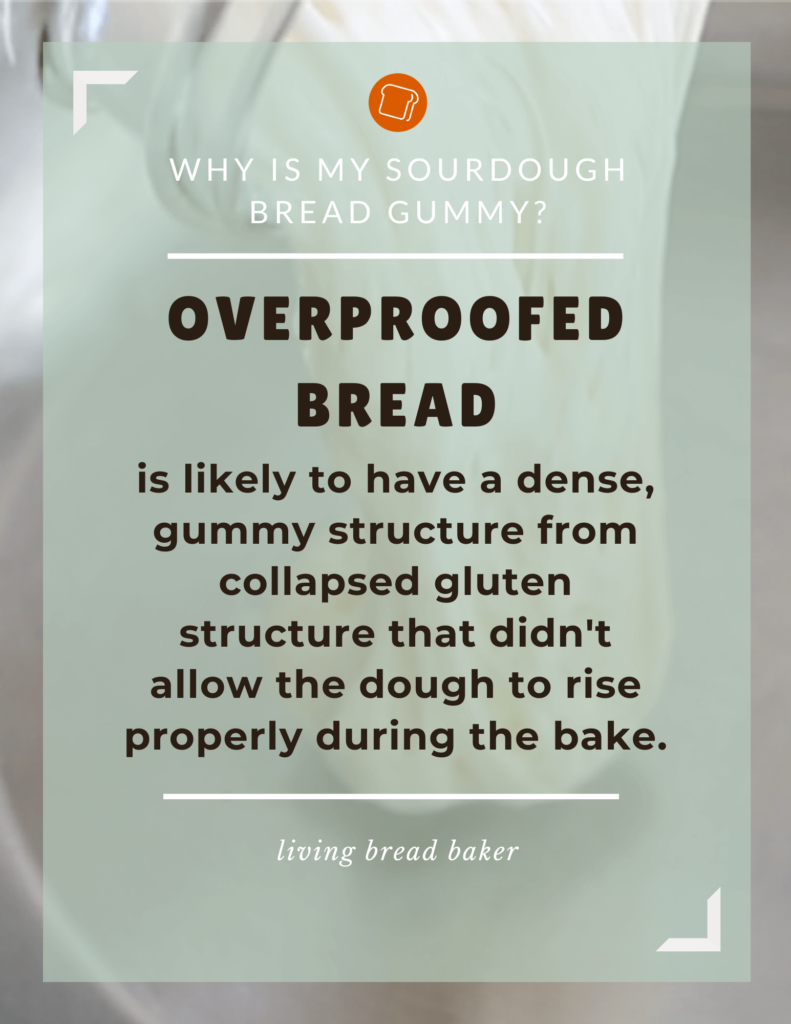
Also, overproofed bread is likely to have a dense, gummy structure from collapsed gluten structure that didn’t allow the dough to rise properly during the bake.
Overproofing is the most common culprit I’ve seen for gummy issues.
Fix:
- There are many signs to know when your dough is proofed properly and ready to bake like volume, appearance and texture. See this post to learn the signs the bulk ferment is done.
- A helpful way to know if your dough is ready to bake is the poke test. Moisten a finger with water, press about an inch into the dough—if it springs back slowly and leaves a slight indent, it’s ready.
- Use the fridge to slow down the dough activity during the preheating process. I highly recommend putting proofing dough into the fridge for at least 30 minutes before baking for better results with the scoring and oven spring.
- For my standard sourdough recipes (lean dough), the proofing time ranges from 1 to 3 hours at room temperature or 8-14 hours in the fridge.
- Use equal parts experience and observation to determine proofing rather than relying on an exact timing rule.
6. Improper Baking Conditions
The cooking process plays a big role in achieving the right texture of the crumb. If the bread bakes in a cool oven or without enough heat retention, it won’t have the right conditions to develop the right structure.
A properly heated hot oven creates the conditions for the dough to heat up enough for more rapid expansion of steam which results in great oven spring.
Fix:
- Preheat your oven properly before baking. A baking stone or preheated Dutch oven helps create steam for an open bake and better crust formation. See this post about manually steaming your oven for the best bake.
- Make sure your dough is placed in the center of the oven for best baking results.
- Place the bread directly on the rack for the second stage of the bake after removing it from the Dutch oven (if using one) for more even baking.
- If you are consistently having heat issues with your oven, use an oven thermometer to make sure it is calibrated to the correct temperature.
7. Not Cooling Properly
Fresh baked bread is so irresistible! But if you cut right into a hot, steamy loaf right out of the oven you’ll arrest the completion of the bake that is happening during cooling.
Not only does cutting into bread too soon after baking cause gumminess, it also makes the bread stale faster.
Fix:
- Let your bread cool for at least one hour before cutting.
- If you are planning to store your bread and use it for the week, I recommend cooling it overnight so it can be cut into thinner, even slices more easily.
Checklist: How to Prevent Gummy Sourdough
Here is a quick-reference checklist to help you troubleshoot and prevent gumminess:
✅ Use a strong, active starter (bubbly and doubled in size).
✅ Allow enough bulk fermentation—not too short, not too long.
✅ Adjust hydration—use less water if dough is too wet or the climate is humid.
✅ Ensure the dough fully rises before shaping.
✅ Bake in a fully preheated Dutch oven or on a baking stone.
✅ Check the internal temperature of the loaf (should be 205–210°F (96–99°C)).
✅ Let bread cool completely before slicing! Cutting too soon can make it feel gummy.
Tools for Baking The Perfect Loaf
Below are some tools that are mentioned in this article. The tools listed below are affiliate links, meaning I may earn a small commission if you make a purchase, see my affiliate dislosure here.
- Kitchen scale
- Dutch oven
- Kitchen thermometer for use in meat or bread
- Oven thermometer
- Cooling rack
Sample: Sourdough Baking Schedule
A well-planned schedule prevents rushed fermentation and underbaked bread. Here’s a sample timeline for making sourdough at home:
- Day 1 (Night): Feed your sourdough starter.
- Day 2 (Morning): Mix dough, let it rest (autolyse), then add salt.
- Day 2 (Morning): Perform 1–4 sets of stretch and folds over the first few hours of the first rise.
- Day 2 (Afternoon): Shape the dough and place it in a proofing basket.
- Day 2 (Evening): Bake your sourdough in a preheated Dutch oven for best results.
✅ Want perfectly baked sourdough every time? Download my free Sourdough Time Planning Worksheet to plan fermentation, proofing, and baking for a stress-free sourdough experience! Click here to download my free Sourdough Time Planning Worksheet.
This free worksheet comes from my Sourdough Baker’s Workbook, which includes 7 different customizable baking schedules, troubleshooting sheets, and a baking journal!
Seasonal Adjustments for Sourdough Baking
Many people don’t realize how ambient temperature and humidity affect their dough. Here are some seasonal and climate based adjustments you can consider to improve your results:
- Winter: Use warmer water and proof dough in a warmer spot (like inside an oven with the light on). Bulk fermentation may take longer in cold kitchens.
- Summer: Fermentation speeds up! Use cool water, consider cold proofing overnight, and monitor bulk fermentation to avoid over-proofing. See this post to learn the signs of overproofing.
- Humid Climate: Dough may feel stickier—use less water and ensure proper baking time to drive out excess moisture.
- Dry Climate: Dough can dry out quickly—use a damp kitchen towel or cover with plastic wrap during fermentation.
FAQ for Gummy Sourdough Bread
Q: Is gummy sourdough bread safe to eat?
A: Yes! Gummy bread isn’t unsafe, but it often means underbaking or fermentation issues. You can toast slices or rebake the loaf at 325°F (160°C) for 10–15 minutes to remove excess moisture.
Q: Can I fix a gummy sourdough loaf after baking?
A: If your loaf is already baked, slicing and toasting is your best bet. For future loaves, follow the checklist above for recommendations like adjusting fermentation, hydration, and baking time to prevent the issue.
Q: Does the type of flour affect gumminess?
A: Yes! Whole grain flours absorb more water, while lower-protein flours (like all-purpose) may struggle to develop strong gluten. Bread flour (or a mix) often produces a better crumb. See my favorite formula for sourdough bread in this post.
Final Thoughts: How to Get Better Results Next Time
If your sourdough bread is gummy, take a step back and analyze the entire fermentation process, from starter activity to bulk fermentation and proofing. This is why taking a sourdough course from a qualified instructor is the key to longterm success.
The most common mistakes stem from too much moisture, weak starter activity, short first rise, overproofing, underbaking, or not cooling properly.
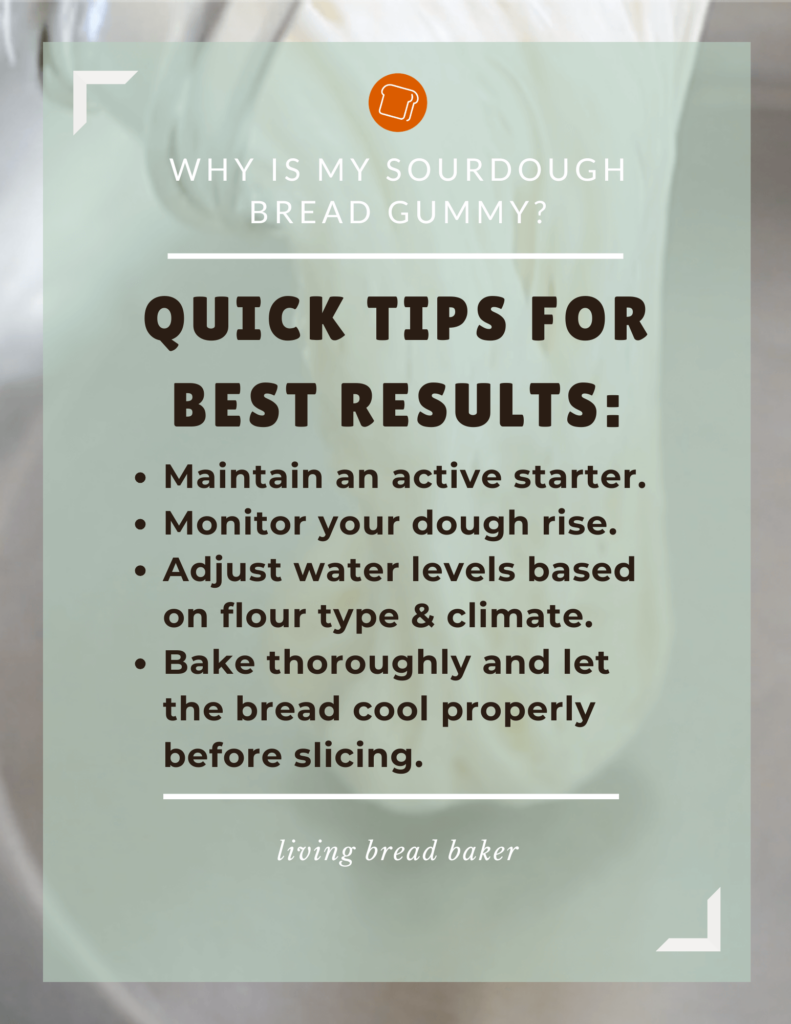
For better results:
- Maintain an active starter.
- Monitor your dough rise. And learn what important signs to look for.
- Adjust water levels based on flour type and climate.
- Bake thoroughly and let the bread cool properly before slicing.
Struggling with Sourdough? Get the Guidance You Need!
Baking great sourdough takes time, but each bake is a learning experience. If you find yourself frustrated or confused, you’re not alone! The best way to build confidence and avoid common mistakes is by learning from a proven system.
My sourdough courses have helped thousands of people simplify the process and start baking delicious sourdough with ease. No more guesswork—just clear steps to success!
Get a free lesson sample and start your sourdough journey today! {Click here}
Free Sourdough Beginner Guide
A competent guide transforms sourdough baking from overwhelming to uncomplicated and fun!
Get My Free Quick Start Sourdough Guide: Learn the key terms and concepts in sourdough baking, including the differences between active sourdough starter and sourdough discard, and how to care for your starter.

If you’re ready to jump in and start baking sourdough confidently—Take the Intro to Sourdough Course for Just $27!
More Sourdough Troubleshooting Help
If you are having issues with your sourdough baking, I have created an expansive library of articles on how to fix sourdough starter and baking issues. Here are some of my most popular posts:
- Sourdough Guide to Flour: Types, Storage, & Tips
- How to tell when sourdough is done with bulk fermentation
- When is sourdough finished proofing? The signs and a test
- Cold Fermentation vs Room Temperature: Which Is Better?
- Sourdough Bread: 10 Signs of a Good Bake (How-to Guide)
- What does overproofed sourdough bread (or dough) look like?
- How to Turn Overproofed Sourdough into Focaccia
Great Lean Sourdough Bread Recipes to Try:
- How to make Sourdough Bread step by step
- Sourdough Apple Cinnamon Spice Country Bread (Boule) Recipe
- Jalapeño Cheddar Sourdough Bread Recipe (Cheesy Crust)
- Easy No Knead Sourdough Bread
- How to Make Cute Pumpkin Shaped Sourdough Bread Boules
This post contains affiliate links. Read my policy here.


I just took out my first attempt at baking a sourdough loaf in my Le Creuset covered cookware. It turned out gummy-too thick in the middle.
Thank you for this helpful, concise text! I’m saving it for future loaves!
I’m glad it was helpful! Good luck on your next bakes!