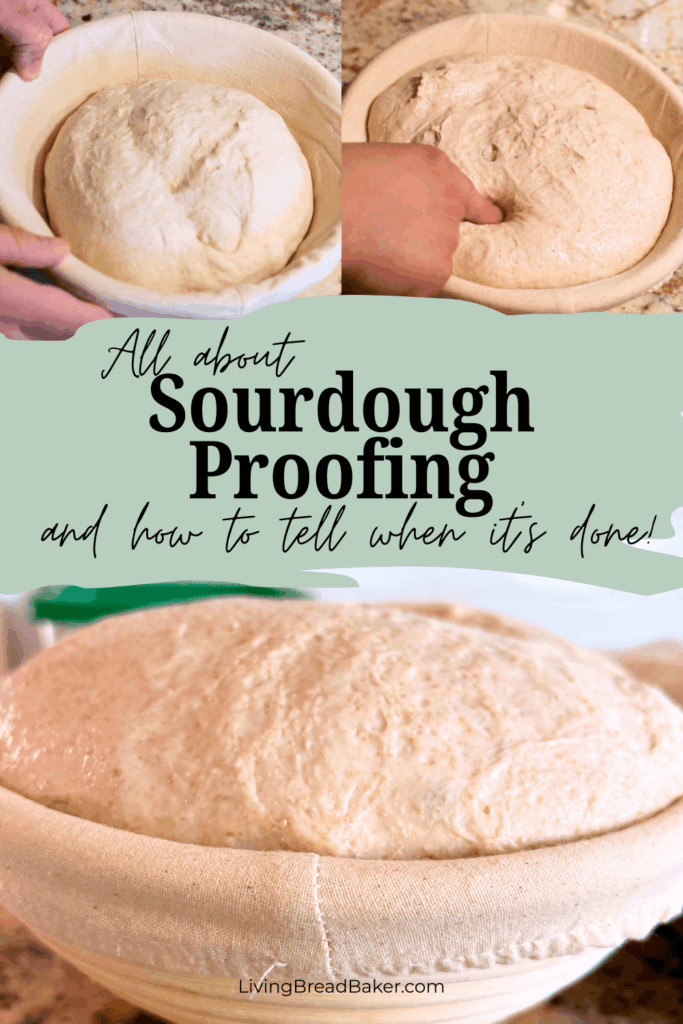
When is sourdough finished proofing? The signs and a test
How do you know when your sourdough is finished proofing (proving) and ready to bake? What is underproofed? What does overproofed look like?
This post will explain what this step in the bread making process is, the differences in stages of proofing, the signs of a proofed loaf, and a helpful test.
Getting the “just right” proof on your dough will give you a soft, airy bake. So if you want to avoid a dense bread or one that is misshapen, read on.
*Note: I will be using the spelling “proofing” in this post since that is the spelling typically used in the U.S. and the one I use in my classes. The spelling “proving” is typically used in Europe, Australia, and other parts of the world.
What is proofing
The fermentation of sourdough (and conventional yeast bread) consists of two stages: bulk fermentation (also known as the first rise) and proofing (also called the second or final rise). (To review all the stages in the sourdough bread making process, you can read more in this post: Beginner’s Guide to the Sourdough Bread Baking Process)
After the bulk ferment is finished, shape the dough into a boule, baguette, loaf, or a parshape like a dough ball that will be shaped into pizza after the rest.
In this shape, the dough is put into a loaf pan, flaxcloth couche for baguettes, proofing basket or bannetton, a baking sheet, or other container specified in the recipe.
It rests in this shaped form in order for the fermentation to continue. As it continues fermenting during the proof, it rises to 1 1/2 to 2 times its volume.
This rise is caused by the wild yeast continuing to “eat” the starches and sugars in the dough and create carbon dioxide as a byproduct.
The carbon dioxide is held in by the strong, elastic dough created by the formation of the gluten protein bonds.

Quick tip on proof timing
In many recipes, the time allotted for proofing is one third to half as long as the bulk ferment.
And the timing will be subject to the air temperature in your proofing area (e.g., kitchen) so err on the longer side of a range in cold weather and the shorter side of the range in warmer weather.
Basic Proofing Tools
- 9-inch Round Proofing Bowl
- Disposable shower caps (for bowl or loaf pan covering)
- Cloth Bowl Covers
- Sandwich Loaf Pan
- Parchment Paper
- Proofing Box for rolls and balls of pizza dough (clicks seals for transporting)
- Proofing cloth (used primarily for baguettes), if you make baguettes, make sure you have a baguette flipping board
For more sourdough tools, you can check out my Amazon sourdough essentials list (see affiliate disclosure)
Have a limited budget? This post outlines the absolute essentials so you don’t have to break the bank to get started plus some hacks to get along without all the “right tools”: Beginners’ Guide to Sourdough Bread Baking Tools on a Budget
Why Does Proofing Matter?
Proofing is critical for getting the right texture and volume on your bread. Here are four reasons why it matters:
- It will create a lovely shape that will be beautiful on the table.
- Good oven spring. This is how the dough rises and expands during baking.
- A soft, airy interior (the texture depends on the recipe, but should never be dense, gummy, or overly chewy)
- Develops an even crumb inside. “Crumb” refers to “the holes” you see once the bread is cut. There shouldn’t be any parts with big holes and others that look squished. It should have the same openness across the slice.
- Best flavor. Fermentation not only affects the volume of the bread, it affects the final flavor. I think we can all agree that this is really important!
- Under or overproofing affects baking time.
Proper proofing ensures the dough’s structure is well-spaced, whereas underproofed dough remains dense and compact. Proofing issues are often what cause the problems with your sourdough bake.
Learn more about getting signs of a great sourdough bake: 10 Signs of a Good Bake (How-to Guide)
Want more sourdough starter info?
You can get my free Quick Start Sourdough Guide to begin learning some of the key parts of the cycle of sourdough starter.
Learn the phases, the signs of an active, how to care for a sourdough starter to keep it alive and thriving, as well as how to make your own sourdough starter.
Also, learn more about sourdough starters in these posts:

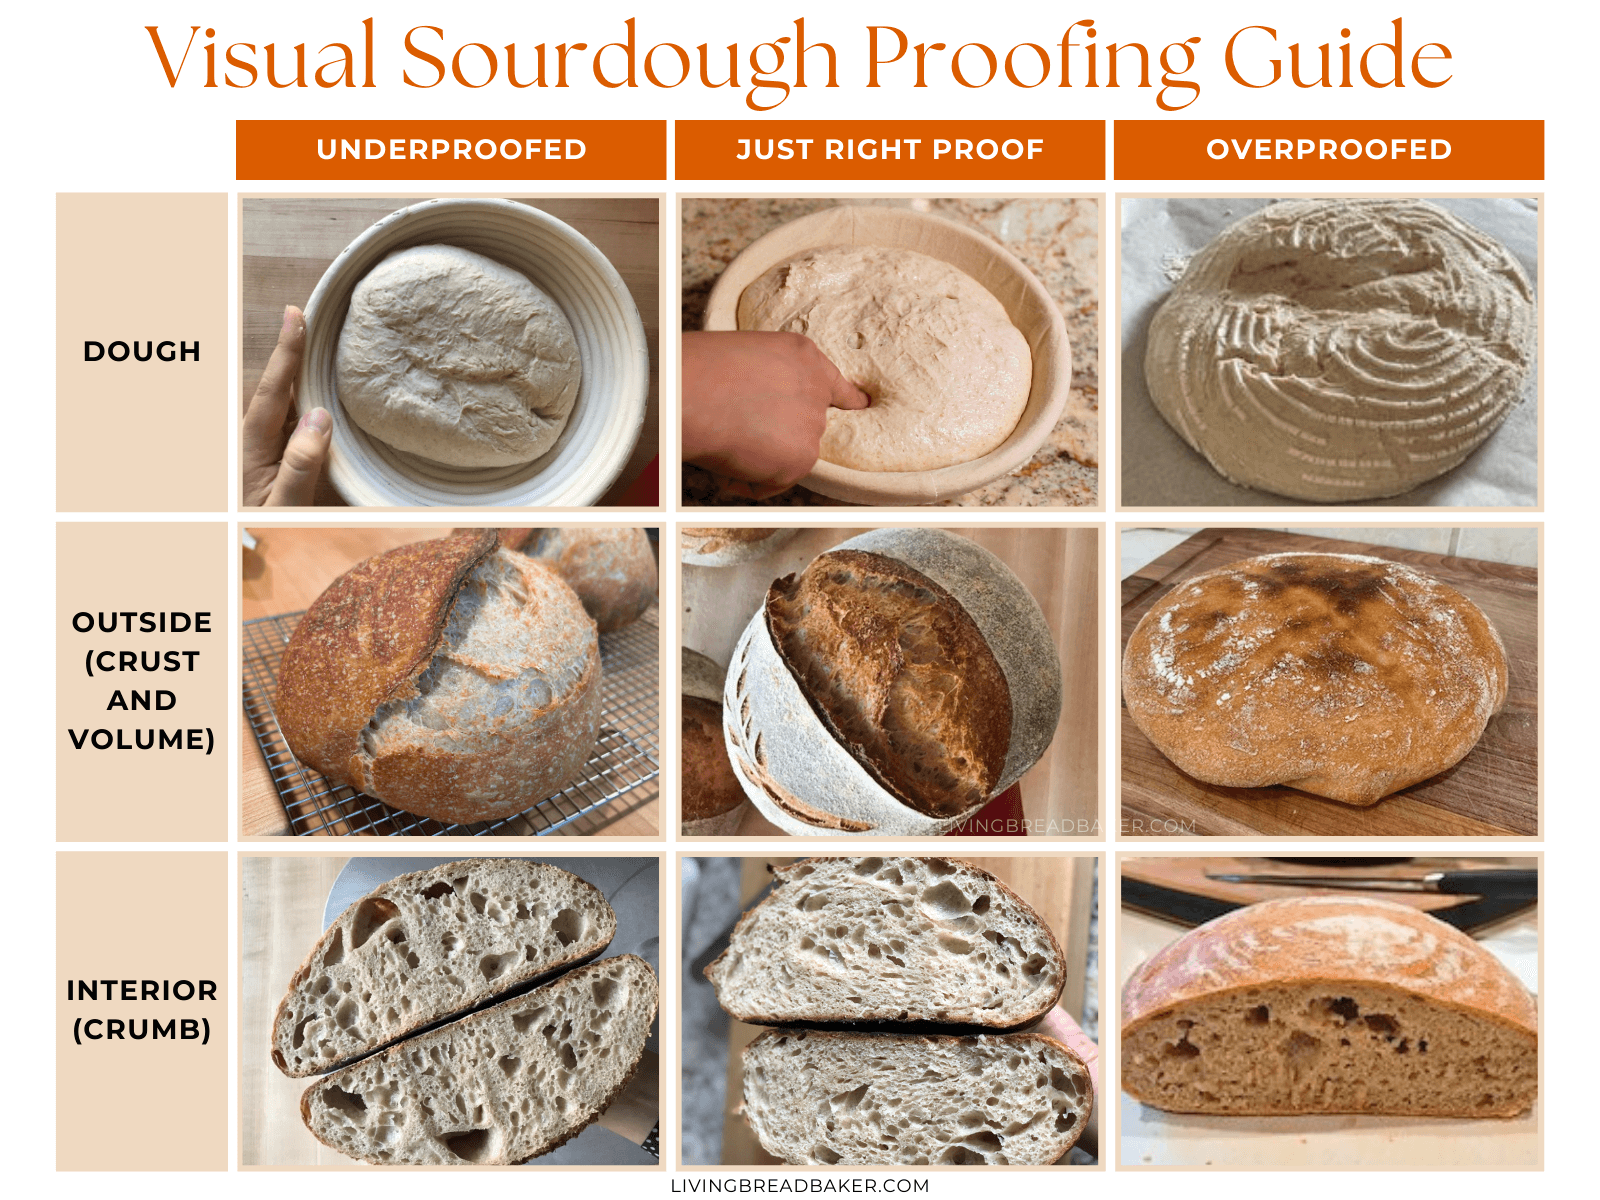
What is underproofed?
Underproofed dough is dense and has not increased in volume.
This will result in a dense bread with a very tight crumb (holes are very close together) that doesn’t have the pillowy texture when you take a bite.
The flavor will lack development.
If you don’t see the signs mentioned below, you’ll want to let your dough rest longer for an optimal proof.
What is overproofed?
Overproofed is when the dough has rested too long and the yeast has continued making carbon dioxide while the strength of the dough (gluten bonds) have begun to wear out.
The dough will look very puffy, but when you touch it or move it you may notice it deflate or sag.
Here is an example of a severely overproofed sandwich loaf.
The fix is to bake it or try to reshape and proof again. For my family, I always choose to bake the bread. Especially since it won’t be long before they finish it and I’m baking the next batch!
- Learn about how to turn overproofed dough into focaccia in this post: How to Turn Overproofed Sourdough into Focaccia
- Learn more about how to recognize, prevent, or fix overproofed sourdough in this post: What does overproofed sourdough bread (or dough) look like?

Cold vs. Room Temperature (Ambient) Proof
You can proof the dough at room temperature, in the fridge for a cold proof, or use a combination of both methods.
The room temperature proof will be the shortest timeline. Due to variation in room temperature and weather, this can vary the timing.
Cold proofing will be a longer timeframe. This also creates a more complex flavor and produces a bread that is even more digestible than typical sourdough bread.
You can also use a combination by proofing your dough at room temperature then putting the dough into the fridge (well covered) for a few hours to overnight.
It will continue to proof in the cold environment, so I recommend using the shorter end of the room temperature proofing range before transferring the dough to the fridge.
Learn more in this post: Cold Fermentation vs Room Temperature: Which Is Better?
Proofing Accessories & Enhancements
For consistent proofing, no matter the season, there are some tools you can use:
- Electric proofing box: This is for serious bakers who want to make an investment for the best automated proofing
- Overturned large plastic bin with the dough underneath and a bowl of steamy just boiled water underneath the box and next to the dough to create a warm environment with some humidity
- OFF Microwave: The microwave creates a well insulated environment for proofing. You would just want to make sure no one turns on the microwave which would end poorly.
- OFF Oven: with the light on for an insulated environment with a gentle amount of heat coming from the light
I really loved some of the ideas shared in this post by Taste of Home, if you are looking for a few more ideas to get the best proof, even in winter. I loved the idea of a dish of boiled water in the oven.
Sourdough Time Planning Tools
My Sourdough Time Planning Workbook and Baking Journal is a great way to simplify all of your sourdough bakes with ready to fill in timelines with 8 options to choose from.
You can get a free sample of the sourdough time planning workbook here.

Quick Proofing Tip for great scoring
Before scoring and baking, place the covered proofed dough in the fridge for 30-60 minutes. The chilled dough will score much more cleanly and easily.
Add a light dusting of flour and smooth over the top of the loaf and use a new razor blade in your bread lame to have the absolute best results.
How to proof sourdough
- After the bulk ferment, shape your dough according to the directions.
- Cover your dough (with kitchen towel or plastic wrap, depending on recipe)
- Let rest in a warm environment (see notes above for variations) for the given proofing time in the recipe
- Check your dough at the short end of the time range to see if it’s ready to bake or if it needs more time to proof.
- Preheat the oven
- Bake
4 signs your dough is proofed and ready to bake
- Dough that has reached is optimal proof should be 1.5 to 2 times larger in volume
- The dough should feel full and airy, but should not sag or collapse (overproofed)
- If the proper sized loaf pan or proofing basket was used, dough should rise nearly to the top or slightly over (for most loaf pans)
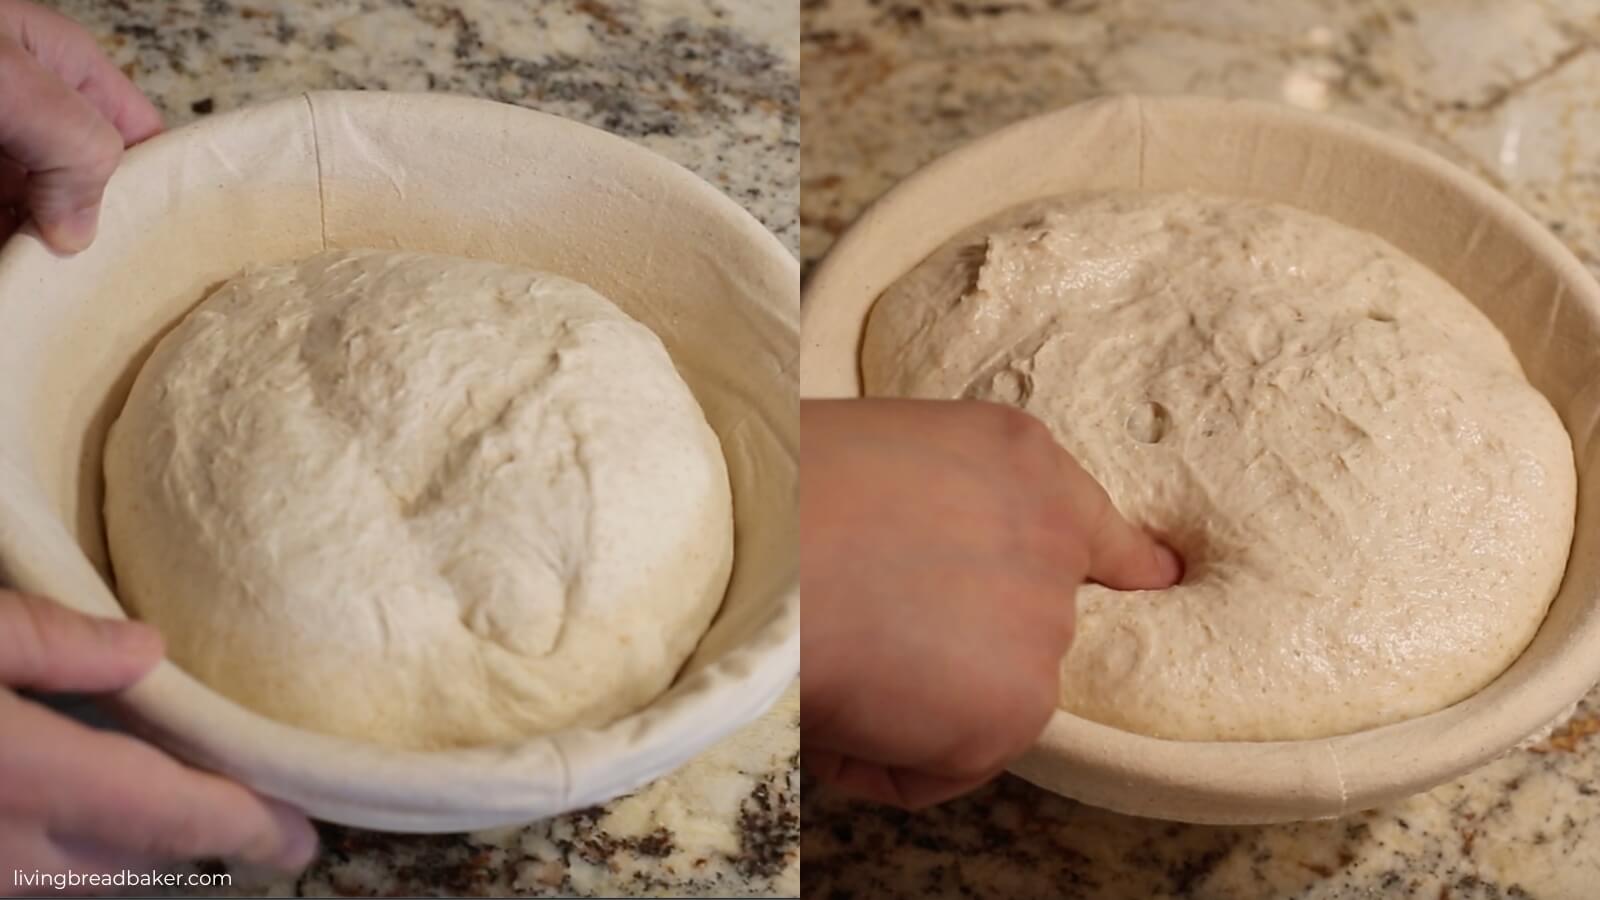
- When a finger tip is lightly dampened and presses about 1/2-inch into the dough, the dough should slightly rise back about halfway and leave an impression where it was poked. This is called the “poke test”
The poke test to test proofing
Below is a video of the “poke test” in action. You can see the indentations I made remaining in the dough.
Overproofed dough shows very little movement and may even deflate slightly.
Underproofed dough would bounce back and wouldn’t show much evidence of indentation.
More Sourdough Troubleshooting and Help
Here are some articles for improving your sourdough baking or solving common problems:
- Make Sourdough Bread step by step
- How to Know When your Sourdough Starter is Ready (8 signs)
- When is sourdough done with bulk fermentation?
- How to Bake Sourdough without a Dutch oven: Manual Steam Method
- Instructions to Shape a Sourdough Sandwich Loaf and Bake with Steam
- Beginners’ Guide to Sourdough Bread Baking Tools on a Budget
- What does a 100% Hydration Sourdough Starter mean?
Surprising tip for good oven spring
To achieve great oven spring, aim for the sweet spot of proofing where the dough is just slightly underproofed.
Preheat the oven and then bake.
Note: As the oven preheats, the dough will continue proofing. Place your dough into the fridge to slow down the process so that it remains in the sweet spot.
Just slightly underproofed will result in a dramatic rise and an impressive ear during baking.
Learn more about the signs of a good sourdough bake (and how to get those results) in these posts:
- Sourdough Bread: 10 Signs of a Good Bake (How-to Guide)
- Cooling Sourdough Bread: Why and How Long You Should Cool
The right proof
Now you have the signs to look for and a test to feel confident in getting the just right proof for your next sourdough bake.
The wait is worth it!
If you are new to sourdough altogether, you can check out my page on learning sourdough with all my best resources and guides or get my free Sourdough Quick Start Guide.
Favorite Sourdough Recipes to Try
- How to Make No Knead Sourdough, The Easy Way
- Sourdough Honey Oat Whole Wheat Sandwich Bread Recipe
- Whole Wheat Sourdough Hokkaido Milk Bread, Japanese inspired
- Easy Sourdough Cinnamon Rolls Recipe (Soft and Fluffy)
- Sourdough Cinnamon Twist Wreath Bread
Just getting started with sourdough?
Learning to bake sourdough doesn’t have to be overwhelming. Whether you’re just getting started or looking for a little more clarity in the process, I’ve got something that will help!
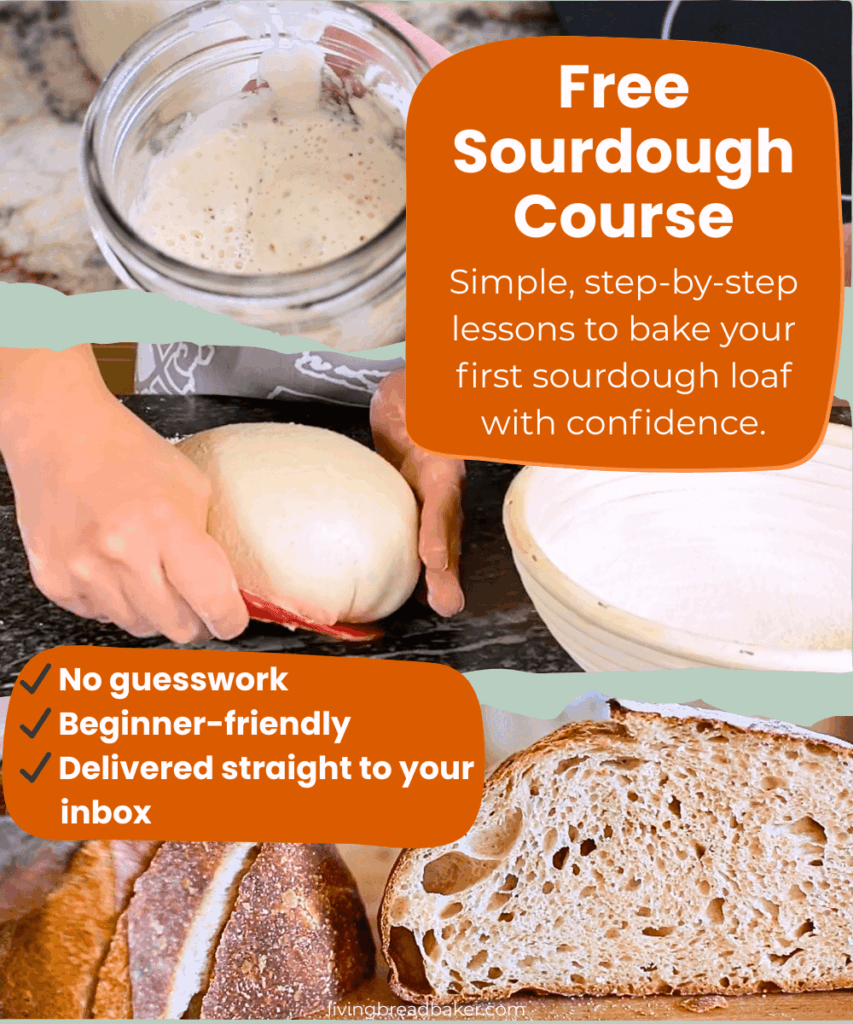
👉 Join my free sourdough email course and learn step-by-step how to go from starter to fresh, homemade sourdough bread—with confidence.
Each lesson is short, beginner-friendly, and designed to help you succeed one step at a time.
No fluff. No guesswork. Just real help for real home bakers.
🎉 Sign up now and start your sourdough journey today!
Join the Free Sourdough Email Course →{click here to sign up!}
Time Planning Help for Sourdough Baking
The #1 need for sourdough bakers is help with time planning, so I created a resource for you.
Sourdough Time Planning Workbook: Perfect for new or experienced bakers, this workbook includes 8 templates ready to fill in and a baking journal. The templates cover 4 different ways to make classic sourdough country breads, 3 time planning worksheets for enriched sourdough bread depending on serving time target, and a blank template. The baking journal goes over baker’s percentages and how to take notes on your sourdough bakes.
Get a free sample of the workbook: Use this sourdough time planning worksheet sample to simplify your baking.
Living Bread Baker posts mentioned
What does overproofed sourdough bread (or dough) look like?
Beginner’s Guide to the Sourdough Bread Baking Process
How to make sourdough step by step: My Classic Sourdough Country Loaf
When is my bulk ferment finished
Make Sourdough Bread step by step
How to Know When your Sourdough Starter is Ready (8 signs)
When is sourdough done with bulk fermentation?
Cold Fermentation vs Room Temperature: Which Is Better?
How to Bake Sourdough without a Dutch oven: Manual Steam Method
Instructions to Shape a Sourdough Sandwich Loaf and Bake with Steam
Sourdough Bread: 10 Signs of a Good Bake (How-to Guide)
Beginners’ Guide to Sourdough Bread Baking Tools on a Budget
What does a 100% Hydration Sourdough Starter mean?
How to Make No Knead Sourdough, The Easy Way
Sourdough Honey Oat Whole Wheat Sandwich Bread Recipe
Whole Wheat Sourdough Hokkaido Milk Bread, Japanese inspired
Easy Sourdough Cinnamon Rolls Recipe (Soft and Fluffy)
Sourdough Cinnamon Twist Wreath Bread
Shop this post
Free Sourdough Quick Start Guide
Sourdough Time Planning Workbook
Online Intro. to Sourdough course
This post contains affiliate links. Read my policy here.


I have tried everything to get an eatable sourdough but every time they come out like a puddle after the the main overnight fermentation. I have followed every recipe and I feel ready to give up. I’m wasting so much dough. I need help.
Hi Elizabeth, That sounds so frustrating! I’m sorry. First, are you using an established starter? I don’t recommend beginners make their own unless absolutely necessary. Second, what is coming out as a puddle after overnight fermentation–the starter or dough? For most recipes, overnight at room temperature would be a bit long for the dough. And following lots of online advice and recipes will definitely lead to overwhelm. I’d recommend picking one method or one course and taking that rather than trying new approaches. I have an intro to sourdough course but there are many out there! I also have a step by step sourdough recipe: https://livingbreadbaker.com/basic-country-sourdough-bread/
Some flour has more hydration than others so maybe you try using less water or a different flour. Another tip I found was to hydrate the flour first, so add just the flour and water let it rest 30 minutes then add the starter and salt or just the starter and wait another 30 minutes before adding the salt. When I first started making sourdough bread it was very frustrating, too dense, over proofed , gummy bread, tough crust, burnt crust, undercooked….you name it!But in the end it was all eaten !! I did experiment with different recipes and techniques until I found that I just needed to relax about the process. I was a bit overwhelmed by the measuring, timing etc. I started using a metal loaf pan 9x5x2 3/4 with my dough because it wasn’t holding the shape and it comes out perfect. I don’t get to make any fancy scoring because it’s too wet but the pan holds the shape and it’s great for sandwiches or just butter! Hope this helps. Happy baking!
I love hearing that Patricia! I’m glad you didn’t give up despite some less than stellar bakes. Even imperfect bread is edible! I hope you continue to gain more confidence in baking.
I am very new at sourdough, but I was having those results, too. It was so disheartening.
My best advice is to use less water and to not bulk ferment overnight. Try six hours. You don’t want it to double, do you want it to be less than double. The main thing for me was use less water. This works for me at my house:
285g bottled room temp water
60-70g starter
400g bread flour
10g salt
Thanks for the tips. I’m also new at sourdough bread baking. What a task…my bread is not very sourdough tasting. What do I need to do to enhance that classic sourdough flavor? Thank you
Hi Malissa,
If your sourdough starter is new, it needs time and consistent feedings to develop maturity for more flavor.
If that’s not your case, a few quick tips: try making a separate whole wheat levain or starter and/or let your dough bulk ferment at room temperature longer–about 7-9 hours depending on room temp. Don’t want to overferment but longer room temperature fermentation will develop more sour flavors.
Let me know how that works for you!
My sister loves super sour sourdough so she uses this recipe: How to Make No Knead Sourdough, The Easy Way