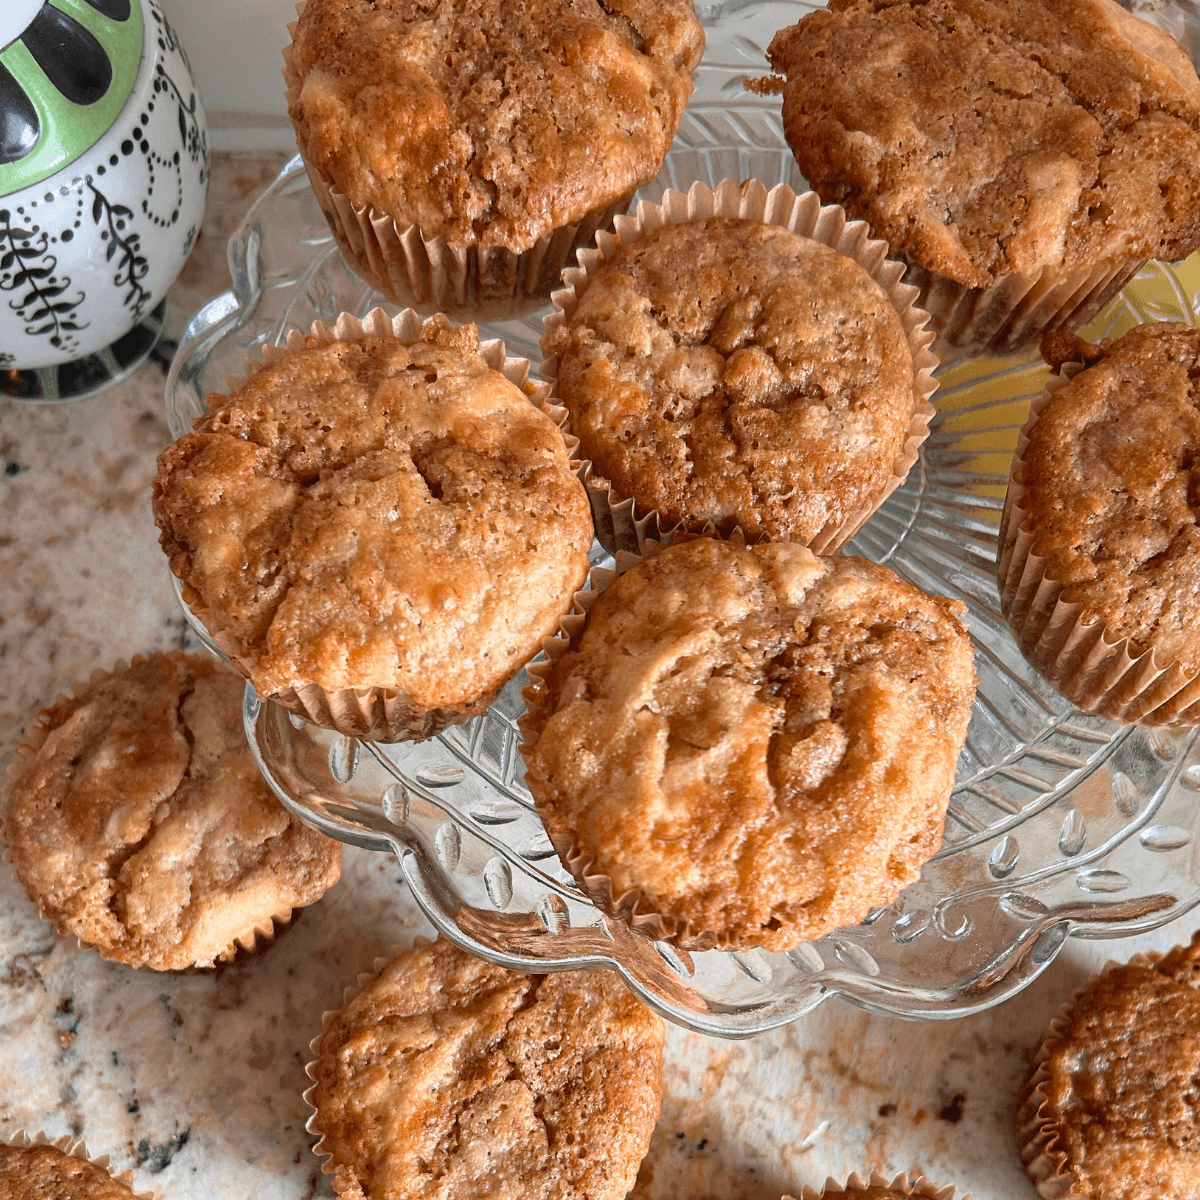
Pumpkin Spice Scones made with Sourdough Discard
Learn to make delicious pumpkin spice scones with sourdough discard
I love the tender, flaky texture of a scone along with the subtle sweetness and flavor of a sweet scone.
During the fall season I love a hot cup of coffee with something sweet and spicy. These pumpkin spice scones are tender, sweet, full of fall spice.

Why use Sourdough Starter Discard?
You can discard the old sourdough starter, but you can also use it in a variety of sourdough recipes like this scone recipe to create more flavor and texture.
Sourdough discard recipes are a great way to use excess sourdough starter (also known as leftover sourdough discard) and reduce food waste.
Another benefit of using sourdough starter discard in sourdough recipes is that when used properly, it can make the recipe more digestible.
Since sourdough starter discard doesn’t have the rising power of active sourdough starter, it is commonly used in crackers, cookies, scones, pancakes, and other versions of quick breads when other leavening agents like baking soda, baking powder, eggs, or a combination are used.
Check out these other posts with videos:
- Why use Sourdough Discard?
- How to Store Sourdough Discard for Starter Discard Recipes
- How to use Sourdough Discard

What is Sourdough Starter Discard?
Sourdough starters go through cycles.
After refreshing a starter, also known as feeding, the sourdough starter ferments and becomes active.
Active refers to the ideal stage of bubbly sourdough starter full of lively wild yeast and thriving lactic acid bacteria which is ideal for baking traditional sourdough bread.
After a sourdough starter is active, it eventually falls into a stage that is often referred to as discard.
This leftover sourdough starter can be used in special recipes known as sourdough discard recipes and only a small portion carries over to be fed in the refreshing process to make the next healthy batch of sourdough starter.
Read more about what sourdough discard is in this post: What is sourdough discard?

How to get started in Sourdough Starter Discard recipes
If you aren’t saving your extra sourdough discard yet, start now.
Any leftover starter that is not used during its active phase for bread making or starter that is used to simply refresh your starter on a regular basis, can be saved in a jar in your fridge.
I use excess sourdough discard starter frequently for crackers, waffles, muffins, and other discard recipes.
This pumpkin spice scone recipe is a great place to get started!
If you don’t have a sourdough starter and want to make your own homemade sourdough starter from scratch, make sure to get my free guide to make one in 7 days: How to Make a Starter from Scratch free guide
Ingredients for Sourdough Pumpkin Spice Scones
For the dough:
- 50 g whole wheat flour (1/3 cup)
- 350 g all purpose flour (2 1/3 cups)
- 100 g brown sugar (1/2 cup)
- 25 g cane sugar (2 T.)
- 15 g baking powder
- 4 g salt
- 6 g (2 t.) ground cinnamon
- 3 g (1 t.) ground ginger
- 2 g (1 t.) freshly ground nutmeg (use a Nutmeg mill or Microplane)
- 2 g (3/4 t.) ground clove
- 134 g (1/2 cup and 1 and 1/2 T.) unsalted butter chilled
- 180 g (2/3 cup) pumpkin purée
- 150 g (1/2 cup and 1-2 T.) sourdough discard (runny texture)
For the icing:
- 65 grams powdered sugar 1/2 cup
- 1 t. vanilla extract (you can sub. maple extract)
- 1-3 t. milk
*Ingredient notes:
- all-purpose flour can be substituted for the whole wheat flour.
- 1 1/2-2 T. pumpkin pie spice mixture can be substituted for the spices.
- Sourdough discard should be a very runny texture. If it’s still bubbly it will be harder to mix in.
- Use a kitchen scale for best results. Cups of flour have a lot of room for error and could create dough that is too dry and harder to mix.
Here’s my amazon list for my Fall Baking Favorites of ingredients and tools (affiliate link).
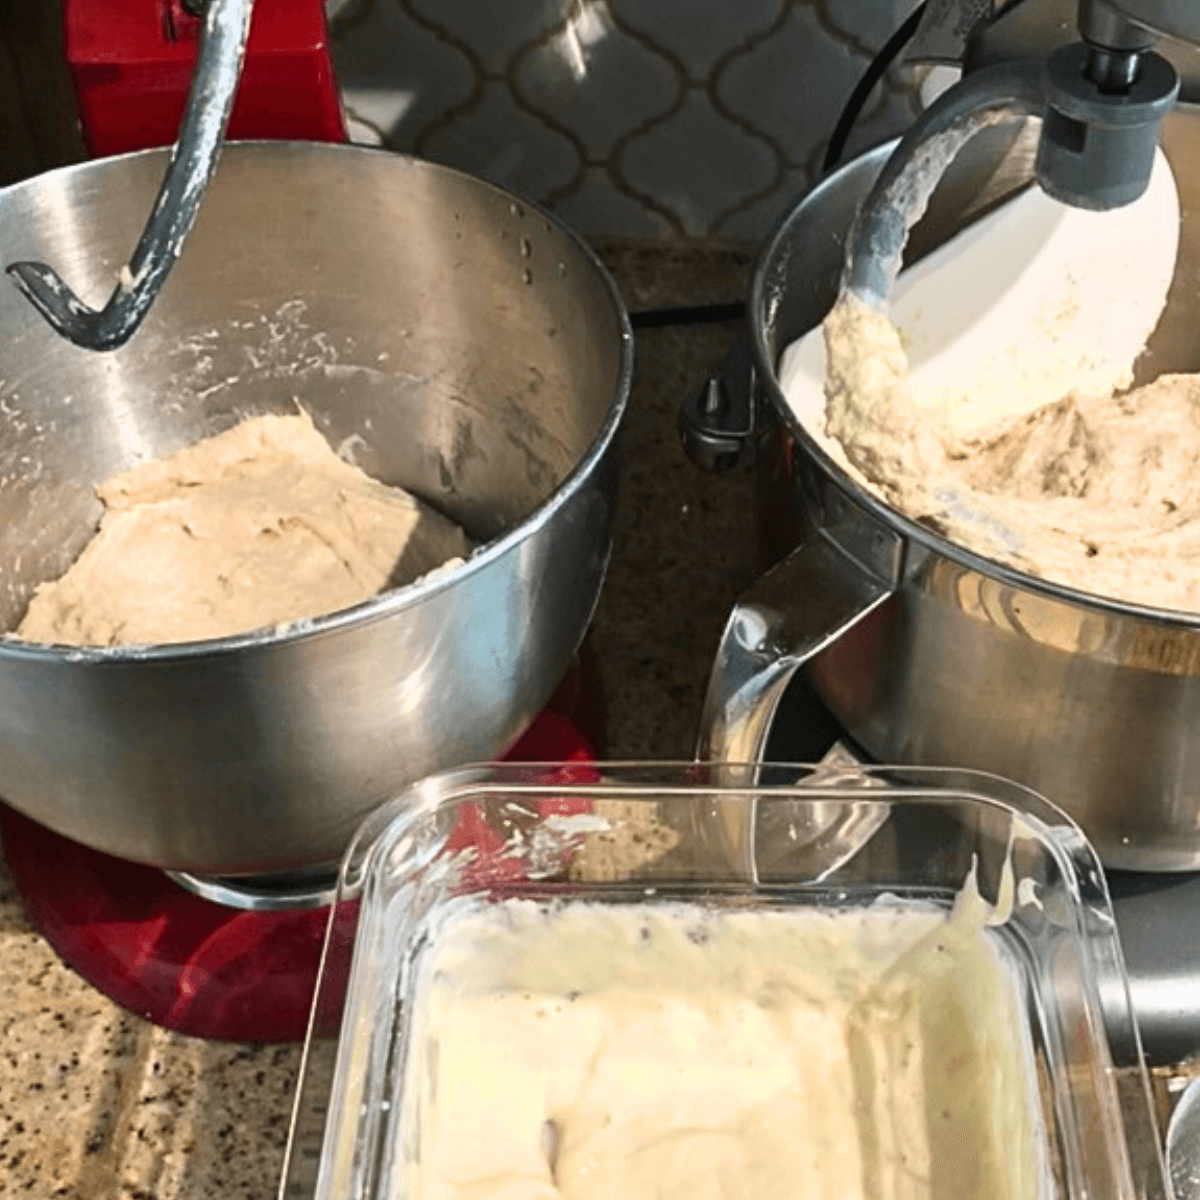
Mixing Sourdough Pumpkin Scones Dough
When mixing up scone dough, whether they are sourdough or not, it is important to use cold butter and keep it cold and avoid overworking the dough for the best flaky texture.
The first step is stirring together the dry ingredients in a large bowl.
Then, cut the cold unsalted butter into smaller pieces and add them to the flour mixture.
Use a pastry cutter or two forks to cut the butter into the dry mixture until the butter pieces create a sandy texture with pieces of butter are no bigger than a pea.
Once the flour and butter mixture are made, add the wet ingredients. In this recipe, add the pumpkin puree and runny sourdough discard.
Stir in the wet ingredients using a spoon or rounded dough scraper until there’s no clumps of dry flour.
If your butter is becoming soft, place the bowl into the fridge to rechill the butter before continuing to mix.
Mixing Tips for Making the Best Scones
- Keep your butter as cold as possible. Cold butter helps create flaky layers in the scones.
- A pastry cutter (pastry blender) mixes the butter into the flour mixture quickly and easily. Putting the dry mixture into a food processor and adding the butter using the pulse setting is effective too.
- Chill the dough for 15-30 minutesif the butter becomes soft or shiny.
- Use a kitchen scale for the most accurate flour measuring. Flour measured by cup can vary by 50 to 100 grams based on how it was scooped.
- Resist the urge to knead or overwork the dough.
- Cutting the wet ingredients into the flour and butter mixture with a rounded dough scraper or in a food processor using the pulse setting is a technique to avoid overmixing.

More Sourdough Scone Recipes
- The Best Tender Sweet Sourdough Discard Scones (Shortcake)
- The Best Sourdough Discard Berry Scones with Lemon Glaze
- Gingerbread Scones with Eggnog Icing (Sourdough Discard)
How to Ferment of Sourdough Pumpkin Spice Scones
Letting the sourdough discard pumpkin scones dough ferment will make the scones more flavorful, create a more fluffy texture, and will make them more digestible.
There are two ways to ferment the scone dough.
First, you can cover the dough and let it sit in the fridge for at least 2 to 12 hours.
Second, you can shape the scones right away then cover with plastic wrap and place in the fridge to ferment for 2 to 12 hours.
You can do a combination, but I would not let the dough sit in the fridge for longer than 24 hours total because the longer it sits it will also develop the gluten which won’t impact digestibility but will make them more chewy than flaky.
4 Reasons to Ferment Sourdough Pumpkin Scones
If you were itching to bake these right away, you could skip this step but here are a few reasons why you might want to delay:
- Fermenting sourdough pumpkin spice scones results in more digestible scones.
- The flavor develops more during the fermentation to create the most delicious scones.
- The rise and texture develops more with the cold fermentation.
- Refrigeration also helps the butter stay chilled before baking.

Shaping Sourdough Pumpkin Spice Scones
There are two ways to shape these scones.
Use a lightly floured surface to roll out your dough so that it does not stick to the surface or the rolling pin.
To cut the scone dough, use a large sharp knife or bench knife.
- Best way to get fluffiest scones:
- Split the dough in half and shape each half into a 8-inch wide round using a rolling pin that has an even thickness of 1-inch.
- Then each round into 8 wedges each like a pizza. Once both rounds are shaped and cut, you will have 16 scones total.
- This method is shown in recipe photos below.
- Fastest way to shape scones:
- Roll out all the dough on your floured surface until it is a 11-inch-by-11-inch square that is an even thickness, about 1/2 to 3/4 inch thick.
- Cut the dough in half along the middle of the square along the length and the width so there are four equal smaller square sections.
- Then cut an X in each smaller square to create 16 triangle shaped scones.
- This method is shown in video update.
Once all scones are shaped, transfer to a flat baking sheet covered with a piece of parchment paper.
Cover with plastic wrap and chill while your oven preheats or for the length of time that you are completing fermentation as described above.
Baking Sourdough Pumpkin Spice Scones
Preheat your oven to 400 degrees F.
Bake for 10 to 14 minutes until a toothpick inserted into the middle of a scone comes out clean.
The edges of the scones should be golden brown.
Move baked scones to a cooling wire rack to cool for 20-25 minutes until completely cooled for adding the icing.
Icing Sourdough Pumpkin Spice Scones
In a small bowl, whisk together the icing ingredients until it is a drizzling consistency.
When you pick up the whisk, the icing should drizzle off the whisk and make lines in the mixture that eventually absorb back into the mixture and disappear.
I love using vanilla extract to create a vanilla icing or glaze, but you can also make a maple glaze using maple extract instead of the vanilla.
Drizzle the icing using a zig zag pattern on the tops of the scones.
Let icing set for 10 to 15 minutes to harden.

Optional: How to Freeze Sourdough Pumpkin Scones
After these have been shaped, find a baking sheet that can fit into your freezer and line it with parchment paper.
Place the shaped scones on the prepared baking sheet. They can be close together, but not touching.
Cover with plastic wrap and par freeze for about 2 hours.
Once the unbaked scones are frozen, transfer them to a gallon sized freezer bag.
Then, whenever you want to make fresh baked scones, you can take out a few or several and bake as directed above with about 2 extra minutes added!
The timing from frozen will be 12 to 16 minutes.
See a full post on freezing sourdough goods and sourdough bread here: How to Freeze Sourdough Bread, Scones, & More (Easy & Fast)
More Sourdough Pumpkin Recipes and Fall Flavors
- 4 Secrets for the Best Sourdough Pumpkin Spice Waffles (Overnight)
- Sourdough Apple Cinnamon Spice Country Bread (Boule) Recipe
- Right Away Sourdough Discard Pumpkin Spice Waffles
- Pumpkin Rolls (Sourdough)
- Pumpkin Shaped Sourdough Boules
- Skillet Sourdough Apple Cinnamon Swirl Bread Recipe
- Sourdough Apple Fritter Bread Fall Sourdough Recipe
Get even more fall pumpkin inspiration in this post from Shopping with Lori where this recipe is featured alongside 20 other great posts for all things pumpkin!: All Things Pumpkin Roundup-Over 20 Fall Favorites
Savor and Share
I love the warm cinnamon and pumpkin spice flavor of these scones!
And this is a great make-ahead option whether you have the scones waiting to bake in the fridge or in your freezer.
Make sure to share this recipe with a friend! And if you make it, I’d love to hear about it–you can comment on this post or tag me on instagram @livingbreadbaker!
Just getting started with sourdough?
A competent guide transforms sourdough baking from overwhelming to uncomplicated and fun!
Get My Free Quick Start Sourdough Guide: Learn the key terms and concepts in sourdough baking, including the differences between active sourdough starter and sourdough discard, and how to care for your starter.
Start Baking Sourdough Confidently—Take the Intro to Sourdough Course for Just $27!
Time Planning Help for Sourdough Baking
The #1 need for sourdough bakers is help with time planning, so I created a resource for you.
Sourdough Time Planning Workbook: Perfect for new or experienced bakers, this workbook includes 8 templates ready to fill in and a baking journal. The templates cover 4 different ways to make classic sourdough country breads, 3 time planning worksheets for enriched sourdough bread depending on serving time target, and a blank template. The baking journal goes over baker’s percentages and how to take notes on your sourdough bakes.
Get a free sample of the workbook: Use this sourdough time planning worksheet sample to simplify your baking.

Living Bread Baker posts mentioned
How to Store Sourdough Discard for Starter Discard Recipes
Right Away Sourdough Discard Pumpkin Spice Waffles
Pumpkin Shaped Sourdough Boules
Skillet Sourdough Apple Cinnamon Swirl Bread Recipe
Sourdough Apple Fritter Bread Fall Sourdough Recipe
Shop this post
free sourdough quick start guide
online Intro. to Sourdough course
This post contains affiliate links. Read my policy here.

Pumpkin Spice Scones (sourdough discard)
Equipment
- baking sheet
- Parchment Paper
- pastry cutter (or forks)
- Food Scale
- Rolling Pin
- Mixing Bowl
- bench knife or large knife
Ingredients
- 50 g whole wheat flour 1/3 cup
- 350 g all purpose flour 2 and 1/3 cups
- 100 g brown sugar 1/2 cup
- 25 g cane sugar 2 T.
- 15 g baking powder 1 T.
- 4 g salt
- 6 g cinnamon 2 t.
- 3 g ginger 1 t.
- 2 g freshly ground nutmeg 1 t.
- 2 g ground clove 3/4 t.
- 134 g unsalted butter chilled (10 T.)
- 180 g pumpkin purée about 3/4 cup
- 150 g runny sourdough discard about 3/4 cup
Icing
- 65 grams powdered sugar 1/2 cup
- 1 t. vanilla extract (you can sub. maple extract)
- 1-3 t. milk
Instructions
- Mix dry ingredients (flour, spices, salt, baking powder) in a bowl.
- Cut butter into cubes or slices. Incorporate into dry ingredients with pastry cutter or forks.
- Once the dry ingredients and butter are combined and the butter pieces are no bigger than a pea, mix in the pumpkin purée and sourdough discard. Mix until just wet and no dry flour. Don’t overmix.
- Optional: These can be shaped and baked right away or for optimum digestibility, softer crumb, and more pronounced flavor, you will want to put your dough into the fridge to ferment. To ferment, cover dough and put in the fridge for 2-12 hours to develop flavor and let the sourdough begin to break down the gluten for digestibility. See fermentation notes in full post.
- Prepare 2 baking sheets by placing a sheet of parchment paper on top of each one. Use a lightly floured surface to roll out your dough so that it does not stick to the surface or the rolling pin.To cut the scone dough, use a large sharp knife or bench knife.

- There are two ways to shape these scones:#1 Best way to get fluffiest scones:Split the dough in half and shape each half into a 8-inch wide round using a rolling pin that has an even thickness of 1-inch.Then each round into 8 wedges each like a pizza. Once both rounds are shaped and cut, you will have 16 scones total.This method is shown in recipe photos.OR#2 Fastest way to shape scones:Roll out all the dough on your floured surface until it is a 11-inch-by-11-inch square that is an even thickness, about 1/2 to 3/4 inch thick.Cut the dough in half along the middle of the square along the length and the width so there are four equal smaller square sections.Then cut an X in each smaller square to create 16 triangle shaped scones.This method is shown in video update.
- Once all scones are shaped, transfer to prepared baking sheets. Cover with plastic wrap and chill while your oven preheats or for the length of time that you are completing fermentation as described in full post.
- Optional: Keep scones in the fridge to ferment for 2 to 12 hours.
- Preheat oven to 400 degrees F.
- Bake one pan of scones at a time.
- Bake each pan for 12-14 minutes until a toothpick inserted into the middle of the largest scone comes out clean.
- Move scones to a cooling rack.
- Once scones are no longer hot and only slightly warm (20-30 minutes), whisk together the ingredients for the icing. The consistency should be drizzling consistency--when you lift up the whisk, the icing should drizzle off and make a defined pattern on the rest of the icing before it dissolves back into the rest of the batch.
- Drizzle icing in a zigzag pattern across the tops of the scones.

- Enjoy!