The Easiest Super Soft Sourdough Crescent Rolls Recipe
Sourdough Crescent Rolls are an excellent treat for any occasion and these ones are really easy to put together!
Light, fluffy, sweet and subtly tangy, these rolls are versatile and perfect for pairing with sweet or savory fillings.
Whether you’re preparing for a family brunch or looking for a simple addition to dinner, these rolls are delicious for every palate!

Ingredients for Sourdough Crescent Rolls
For these crescent rolls, you’ll need a few ingredients to make a soft, enriched dough that bakes up fluffy and golden.
Make sure to read all the other ways you can use this versatile dough recipe!
Makes 24 sourdough crescent rolls
- Starter Preparation
- 15-20g (1 tablespoon) sourdough starter
- 60g (7 tablespoons) all-purpose flour
- 60g (¼ cup) water
- Dough
- 100g (1/4 c. and 2 T.) whole milk, warmed (see *Scalding Milk* section below)
- 40g (2 T. and 2 t.) water
- 30g (2 T.) sugar
- 100g (about 1/2 cup) active sourdough starter
- 375g (2 and 1/2 cups) all-purpose flour
- 4g (1 teaspoon) vanilla (optional)
- 7g (1 teaspoon) salt
- 1 egg
- 45g (3 tablespoons) unsalted butter, softened
- Egg wash
- 1 egg whisked with water
- optional: coarse salt or other topping
Tools Needed to Make Sourdough Crescent Rolls
- Large Glass Mixing Bowl
- Rolling pin
- Rolling pizza cutter
- Parchment Paper
- Pastry brush
- Silicone Oven Mitts
- Baking Pans
- Cooling Rack
See the full list of my recommended essentials here: Amazon idea list of Tools All Bakers Need (see affiliate disclosure)

Fermentation Timing: Rise Times
- 6-12 hours Starter Activation
- 4-8 hours Bulk Fermentation
- 1-2 hour Proofing
These time ranges are impacted by the temperature of ingredients when mixed together as well as the weather. In warmer months, the range of time will be on the shorter end.
Cold Fermentation Notes
You can use cold fermentation if you need to prep your dough ahead of time. Use 24 hours for bulk in the fridge and/or 8-10 for cold proofing.
Temper cold dough for 1 hour before shaping after the bulk or before baking for best results.
What Is a Master Recipe?
This sourdough crescent dough is based on my Soft & Sweet Sourdough Master Recipe, which is incredibly adaptable. It’s a great entry level soft, enriched sourdough recipe for beginners. Perfect for making with kids!
Once you learn this dough, you’ll have a foundation for countless sourdough treats—think cinnamon rolls, savory rolls, hamburger buns, and more!
For a full video tutorial on the master recipe, see it here:
This base dough can be used for so many delicious breads. Check out more ideas for how to use this versatile dough here:
- Easy Sweet & Soft Sourdough Bread Master Recipe
- Easy Sourdough Cinnamon Rolls Recipe (Soft and Fluffy)
- Easy Sourdough Pigs in a Blanket Recipe (Mini Hot Dog Bites)
- Skillet Sourdough Apple Cinnamon Swirl Bread Recipe
- Easy & Soft Savory Sourdough Cheese Twist Rolls
Benefits of Sourdough Crescent Rolls
Sourdough not only enhances flavor but also makes these crescent rolls easier to digest and keeps them fresh longer.
The natural fermentation process makes a delicious, wholesome difference compared to traditional store-bought dough.
These don’t contain commercial yeast, but the wild yeast and lactic acid bacteria create the depth of flavor and greater digestibility of this sourdough dinner roll recipe.

How to Make Sourdough Crescent Rolls
Here’s a step-by-step guide for this simple sourdough recipe, covering the starter, ingredient prep, dough-making, proofing, shaping, and baking.
Step 1: Sourdough Starter Preparation
Mix 1 tablespoon of your starter with 60g water and 60g flour in a small bowl or pint size glass mason jar.
Cover and leave at room temperature for 6 to 12 hours until it’s bubbly and doubled in size.
If you need help assessing if you have an active starter, review this post: How to Know When your Sourdough Starter is Ready (8 signs)

Can you use sourdough discard?
I want to start out with a brief PSA before going into more detail:
Active sourdough starter and sourdough discard are NOT the same!
These two stages of starter are very different in texture, appearance, smell, but also in their chemistry and microbiology.
Active starter and sourdough discard interact with ingredients differently. In some recipes like crackers, flatbreads, or cookies, these differences are not as noticeable.
When making bread, sourdough discard does not perform as well as active sourdough starter.
This is because sourdough discard has millions, perhaps billions of starving microbes and a lot of waste material.
Have you ever seen what a ravenous high school football team does to a pizza buffet after a conditioning practice? It isn’t pretty.
Sourdough discard will weaken your dough strength and compromise the texture.
For best results, especially when you want fluffy, beautiful bread, use active sourdough starter.
Read more about sourdough starters and sourdough discard in these posts:
- What is a sourdough starter?
- How to Know When your Sourdough Starter is Ready (8 signs)
- How much does a cup of sourdough starter weigh? (Active vs. Discard)
- What is Sourdough Discard?
- What does a 100% Hydration Sourdough Starter mean?
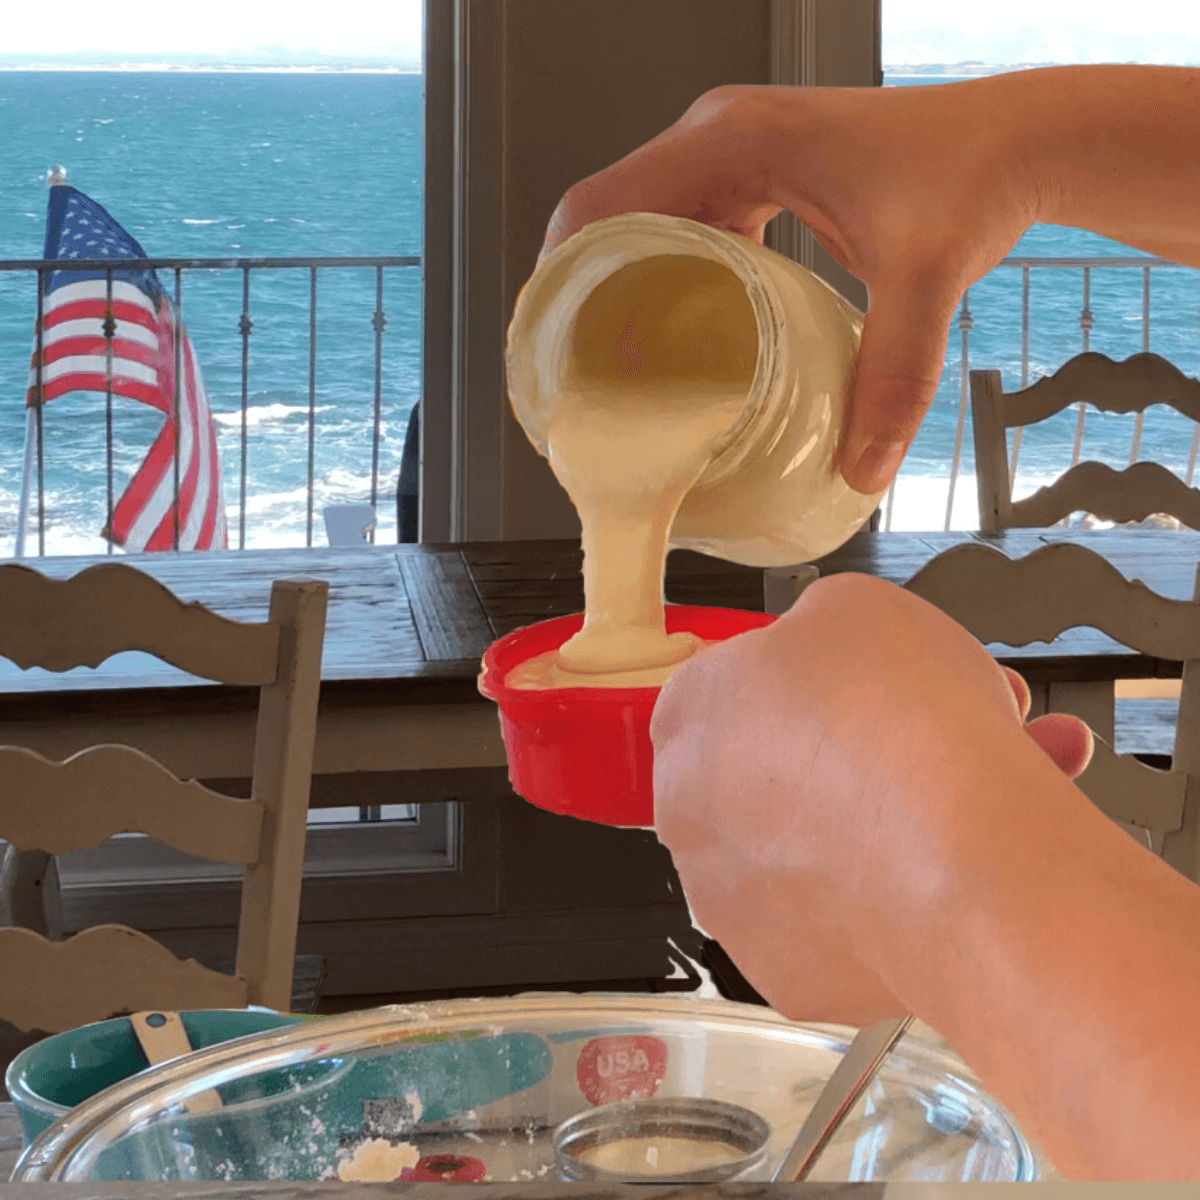
Step 2: Scalding Milk
To ensure the best texture and fermentation activity, scald the milk.
Pour a bit extra milk into a saucepan (to account for evaporation) and heat over medium until it starts to steam.
Once it reaches 130-140°F, set aside 100g of the warm milk to cool slightly before adding to the dough.
Step 3: Making the Dough
Combine the scalded milk, water, sugar, and sourdough starter in a large mixing bowl. Add the flour, vanilla, and egg, and mix until a shaggy dough forms.
If using a stand mixer, knead on low speed with a dough hook for 6-8 minutes; if kneading by hand, expect 8-10 minutes.
Add softened butter, 1 tablespoon at a time, and knead until the dough is smooth and no longer sticky.
Step 4: Bulk Fermentation
Transfer the dough to an airtight container or cover with plastic wrap in a large bowl. Let it ferment for 4-8 hours in a warm place, or until it has doubled in size.
This slow rise develops the flavor and makes the dough easy to work with.
Learn more about the signs of the completion of the first rise in this post: How to tell when sourdough is done with bulk fermentation
 Step 5: Shaping the Crescent Rolls
Prepare two baking sheets by placing a sheet of parchment on each sheet pan.
Place the dough on a lightly floured surface and divide into two equal halves. Roll each half into a 10-12 inch large circle and cut each circle with a rolling pizza cutter or a sharp knife into 12 triangular wedges.
Starting from the wide end, roll each triangle toward the point, forming a classic crescent shape. Place the rolls on a parchment-lined baking sheet, leaving 2-3 inches of space between each.
If desired, you can keep the rolls straight or curve the ends to make it look like the classic croissant shape.
Step 6: Proofing the Crescent Rolls
Cover with plastic wrap and proof at room temperature for 1-2 hours until the rolls are puffy and soft. They should be at least 1.5 times larger than their original size.
Look for the signs and do the poke test described in this post: When is sourdough finished proofing? The signs and a test 
Step 7: Baking
Preheat the oven to 375°F. Prepare egg wash by whisking the egg with a 1/4-1/2 teaspoon of water.
For golden-brown crescents, brush the tops with egg wash. If desired, you can add a sprinkle of coarse salt over the egg wash.
Place into the preheated oven and bake for 16-20 minutes, until golden brown and fluffy.
Step 8: Cooling
Often the most difficult step, but thankfully these soft rolls don’t require a long cooling period.
These crescent rolls should be cool enough to serve after 10-15 minutes of cooling time.
Storing and Reheating
If you have crescent rolls leftover after serving, you can store them once they are completely cooled. Place the rolls in an airtight container or large ziplock bag. If storing for more than 2 days, place in the fridge.
A tip to keep them soft, is to place a slice of plain white bread (sourdough or other) into the container.
Enjoy the leftover rolls within 3-5 days. For great results, refresh the leftover rolls with a minute or two in the toaster oven or in a traditional oven set to 350 degrees F for 3-5 minutes with a squirt of water to steam the oven a bit.
Freezing the Dough
This recipe freezes well, so its a good one to make ahead of time. It’s best to freeze them after they have proofed.
Make sure they are on a baking sheet that can fit in your freezer. After 1 hour of proofing at room temperature, par freeze the rolls on a tray for 1 hour.
Then transfer the frozen rolls to a gallon freezer ziplock bag.
To bake, preheat the oven to 375°F and place the rolls on a parchment lined baking sheet. Before the rolls go in the oven, Egg wash them. Bake 18-24 minutes.
Tip: Label the freezer bag with the recipe name, date, and baking instructions.
For more information on freezing sourdough: How to Freeze Sourdough Bread, Scones, & More (Easy & Fast)

Serving Suggestions
Serve these rolls for a casual weeknight dinner or a holiday bread basket. They can be enjoyed plain, with a serving of butter, or my childhood favorite—a mini sandwich filled with the main and sides of the meal.
They are also excellent alongside a breakfast or brunch. My kids would love these made into mini sandwiches for their lunches as well.
Tips for the Best Sourdough Crescent Rolls
- Knead well: This enriched dough needs thorough kneading to incorporate butter fully and to develop the right texture.
- Room temp proof: Be mindful of room temperature when proofing; warmer rooms speed up the rise.
- Light flour dusting: Only lightly dust the surface when shaping to avoid tough rolls. If your dough is too sticky it could be under fermented or over fermented.
- Monitor baking time: Keep an eye on the rolls as they bake to make sure they don’t overbake.
- Drain toppings: For filled crescents, drain any added ingredients to avoid excess moisture.
- Keep leftovers soft: Place a slice of plain white bread (sourdough or other) with the leftover rolls when storing them in an airtight container.

Variations
Here are some ideas for changing up this savory sourdough snack:
- Use the dough to wrap hot dogs with thin strips of dough to create mummy dogs
- Wrap a section of mozzarella string cheese or cheddar cheese for a delicious cheesy flavor that’s a mix up on traditional grilled cheese
- Place parmesan and minced herbs into the wedges before you roll them up.
- Mix together cinnamon sugar and sprinkle onto the dough before rolling the dough up for a dessert roll.
More Great Recipes using Sourdough to Explore
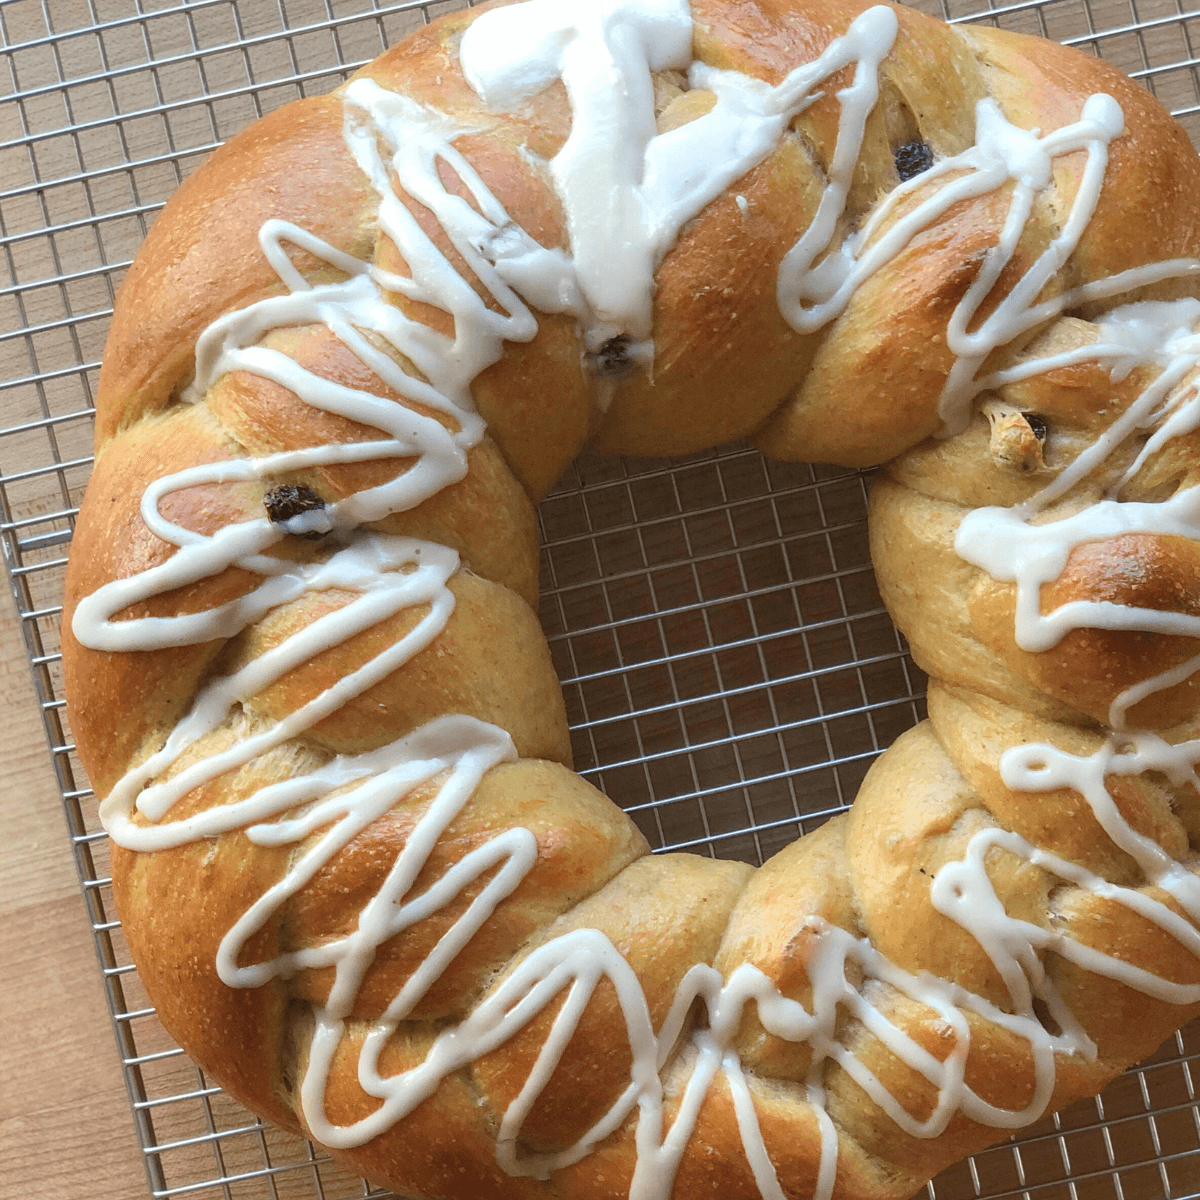
- Sourdough Cinnamon Twist Wreath Bread
- Savory Sourdough Cheese Herb Babka Bread Recipe
- Sourdough Apple Fritter Bread Fall Sourdough Recipe
- Easy Sourdough Pizza Crust Recipe and Guide for Oven Baking
- 30+ Easy Sourdough Recipes for Lunch that Kids Love!
Savor and Share
You’ll love how easy this recipe is and how versatile it is too! Whether you’re serving these crescent rolls as an appetizer, alongside a holiday meal, or adding a sweet or savory filling, they’re sure to become a favorite!
Share the recipe with a friend who loves delicious sourdough recipes.
After you try it, would you be willing to leave a review? Enjoy, and don’t forget to share your baking with me on Instagram @livingbreadbaker!
Just getting started with sourdough?
A competent guide transforms sourdough baking from overwhelming to uncomplicated and fun!
Get My Free Quick Start Sourdough Guide: Learn the key terms and concepts in sourdough baking, including the differences between active sourdough starter and sourdough discard, and how to care for your starter.
Start Baking Sourdough Confidently—Take the Intro to Sourdough Course for Just $27!
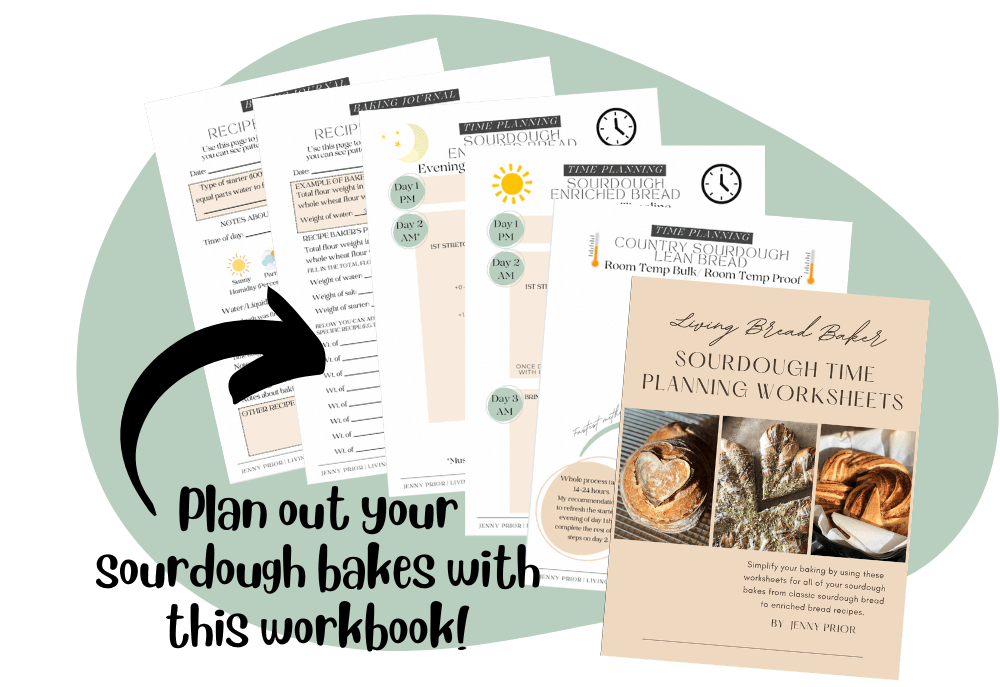
Time Planning Help for Sourdough Baking
The #1 need for sourdough bakers is help with time planning, so I created a resource for you.
Sourdough Time Planning Workbook: Perfect for new or experienced bakers, this workbook includes 8 templates ready to fill in and a baking journal. The templates cover 4 different ways to make classic sourdough country breads, 3 time planning worksheets for enriched sourdough bread depending on serving time target, and a blank template. The baking journal goes over baker’s percentages and how to take notes on your sourdough bakes.
Get a free sample of the workbook: Use this sourdough time planning worksheet sample to simplify your baking.
Living Bread Baker posts mentioned
When is sourdough bulk fermentation finished?
When is sourdough finished proofing?
How to Know When your Sourdough Starter is Ready (8 signs)
How much does a cup of sourdough starter weigh? (Active vs. Discard)
What does a 100% Hydration Sourdough Starter mean?
Sweet & Soft Sourdough Bread Master Recipe
Easy Sourdough Cinnamon Rolls Recipe (Soft and Fluffy)
Sourdough Pigs in a Blanket Recipe (Mini Hot Dog Bites)
Skillet Sourdough Apple Cinnamon Swirl Bread Recipe
Easy & Soft Savory Sourdough Cheese Twist Rolls
Sourdough Cinnamon Twist Wreath Bread
Savory Sourdough Cheese Herb Babka Bread Recipe
Sourdough Apple Fritter Bread Fall Sourdough Recipe
Easy Sourdough Pizza Crust Recipe and Guide for Oven Baking
30+ Easy Sourdough Recipes for Lunch that Kids Love!
Shop this post
FREE Sourdough Quick Start Guide
Sourdough Time Planning Workbook & Baking Journal
My Intro. to Sourdough online course
This post contains affiliate links. Read my policy here.

The Easiest Sourdough Crescent Rolls
Ingredients
Starter Preparation
- 15-20 g 1 tablespoon sourdough starter
- 60 g 7 tablespoons all-purpose flour
- 60 g ¼ cup water
Dough
- 100 g 1/4 c. and 2 T. whole milk, warmed (see *Scalding Milk* section below)
- 40 g 2 T. and 2 t. water
- 30 g 2 T. sugar
- 100 g about 1/2 cup active sourdough starter
- 375 g 2 and 1/2 cups all-purpose flour
- 4 g 1 teaspoon vanilla (optional)
- 7 g 1 teaspoon salt
- 1 egg
- 45 g 3 tablespoons unsalted butter, softened
Egg wash
- 1 egg whisked with water
- optional: coarse salt or other topping
Instructions
- Sourdough Starter Preparation: Mix 1 tablespoon of your starter with 60g water and 60g flour in a small bowl or pint size mason jar. Cover and leave at room temperature for 6 to 12 hours until it’s bubbly and doubled in size.
- Scalding Milk: To ensure the best texture and fermentation activity, scald the milk. Pour a bit extra milk into a saucepan (to account for evaporation) and heat over medium until it starts to steam.Once it reaches 130-140°F, set aside 100g of the warm milk to cool slightly before adding to the dough.
- Making the Dough: Combine the scalded milk, water, sugar, and sourdough starter in a large mixing bowl. Add the flour, vanilla, and egg, and mix until a shaggy dough forms. If using a stand mixer, knead on low speed with a dough hook for 6-8 minutes; if kneading by hand, expect 8-10 minutes. Add softened butter, 1 tablespoon at a time, and knead until the dough is smooth and no longer sticky.
- Bulk Fermentation: Transfer the dough to an airtight container or cover with plastic wrap in a large bowl. Let it ferment for 4-8 hours in a warm place, or until it has doubled in size.
- Shaping the Crescent Rolls: Prepare two baking sheets by placing a sheet of parchment on each sheet pan. Place the dough on a lightly floured surface and divide into two equal halves. Roll each half into a 10-12 inch large circle and cut each circle with a rolling pizza cutter or a sharp knife into 12 triangular wedges. Starting from the wide end, roll each triangle toward the point, forming a classic crescent shape. Place the rolls on a parchment-lined baking sheet, leaving 2-3 inches of space between each. If desired, you can keep the rolls straight or curve the ends to make it look like the classic croissant shape.
- Proofing the Crescent Rolls: Cover with plastic wrap and proof at room temperature for 1-2 hours until the rolls are puffy and soft. They should be at least 1.5 times larger than their original size.
- Baking: Preheat the oven to 375°F. Prepare egg wash by whisking the egg with a 1/4-1/2 teaspoon of water. For golden-brown crescents, brush the tops with egg wash. If desired, you can add a sprinkle of coarse salt over the egg wash.Place into the preheated oven and bake for 16-20 minutes, until golden brown and fluffy.
- Cooling: Place baked crescent rolls on a cooling rack to cool for 10-15 minutes before enjoying.