How to Schedule Sourdough Baking in Your Busy Life (Samples)
Aside from learning starter care, learning how to schedule sourdough baking in your busy life is the other biggest challenge for beginner bakers.
In this post, I’ll share strategies for weekly time planning, best practices for timing the sourdough process, and special holiday bake planning for home bakers.
Plus see some sample schedules and some strategies I use so you can live your life and not become a “bread mom” with a schedule revolving around sourdough!

How to schedule sourdough baking to save your sanity
The long process of sourdough fermentation comes with its own unique learning curve, but learning how to schedule sourdough baking will save you time and sanity.
You need to plan your sourdough baking around your real life by building active work steps like refreshing your starter, mixing dough, shaping, and baking into your existing routine.
Do I need to feed my starter every day?
Feeding your starter or refreshing your starter as I usually refer to it, is needed at least once every 24 hours in a home kitchen if you leave it out at room temperature.
But that routine can be hard to keep up on a busy week.
It can also leave you with too much sourdough discard or leftover unused starter which can feel overwhelming or even wasteful if you don’t have a plan to use it.
If you want the option to make sourdough every day on a whim, then daily feedings might be a good fit for you.
This is why I recommend keeping your starter in the fridge when you are not planning to use it.
If you plan to make only one sourdough recipe each week, which is common for beginning sourdough bakers, then you will refresh your starter a minimum of two times: once 6-12 hours before you make dough to make it active after the refrigerator and again after its been depleted by use in the recipe.
For a great rise and activity, I recommend doing three refreshes for a weekly bake: once 24 hours before you plan to make dough, again 6-12 hours before you plan to make dough, and finally again after the most of the active starter was added to your recipe you feed the small remainder.
There are different opinions on how and when to store your starter in the fridge, I recommend letting it sit at room temperature to activate for 6-12 hours before putting it in the fridge.
When to feed your starter?
The time of day when you feed your starter is really important and is the starting point for creating your sourdough baking schedule.
Most sourdough bakers have one preferred time when they refresh their starter.
The amount of starter you create will vary depending on what recipe you intend to make once it is active.
As a busy homeschooling mom of 4 (almost 5) kids, I am exhausted at the end of the day so I don’t usually plan to mix any bread dough at night, so that’s when I take 3-5 minutes to care for my starter. And by morning, my starter is active and I have the energy to mix my bread dough.
Nighttime Starter Refreshing Routine
If you are at home with kids or work from home, doing a nighttime starter refreshing routine will create an active starter for you to work with in the morning.
In the morning of the next day, you will have your starter ready when you are home to make dough and do some of the most time intensive and hands-on steps.
Often, this routine lends itself to being very straightforward because all the timing can be at room temperature and your recipe will probably be ready to bake by evening.
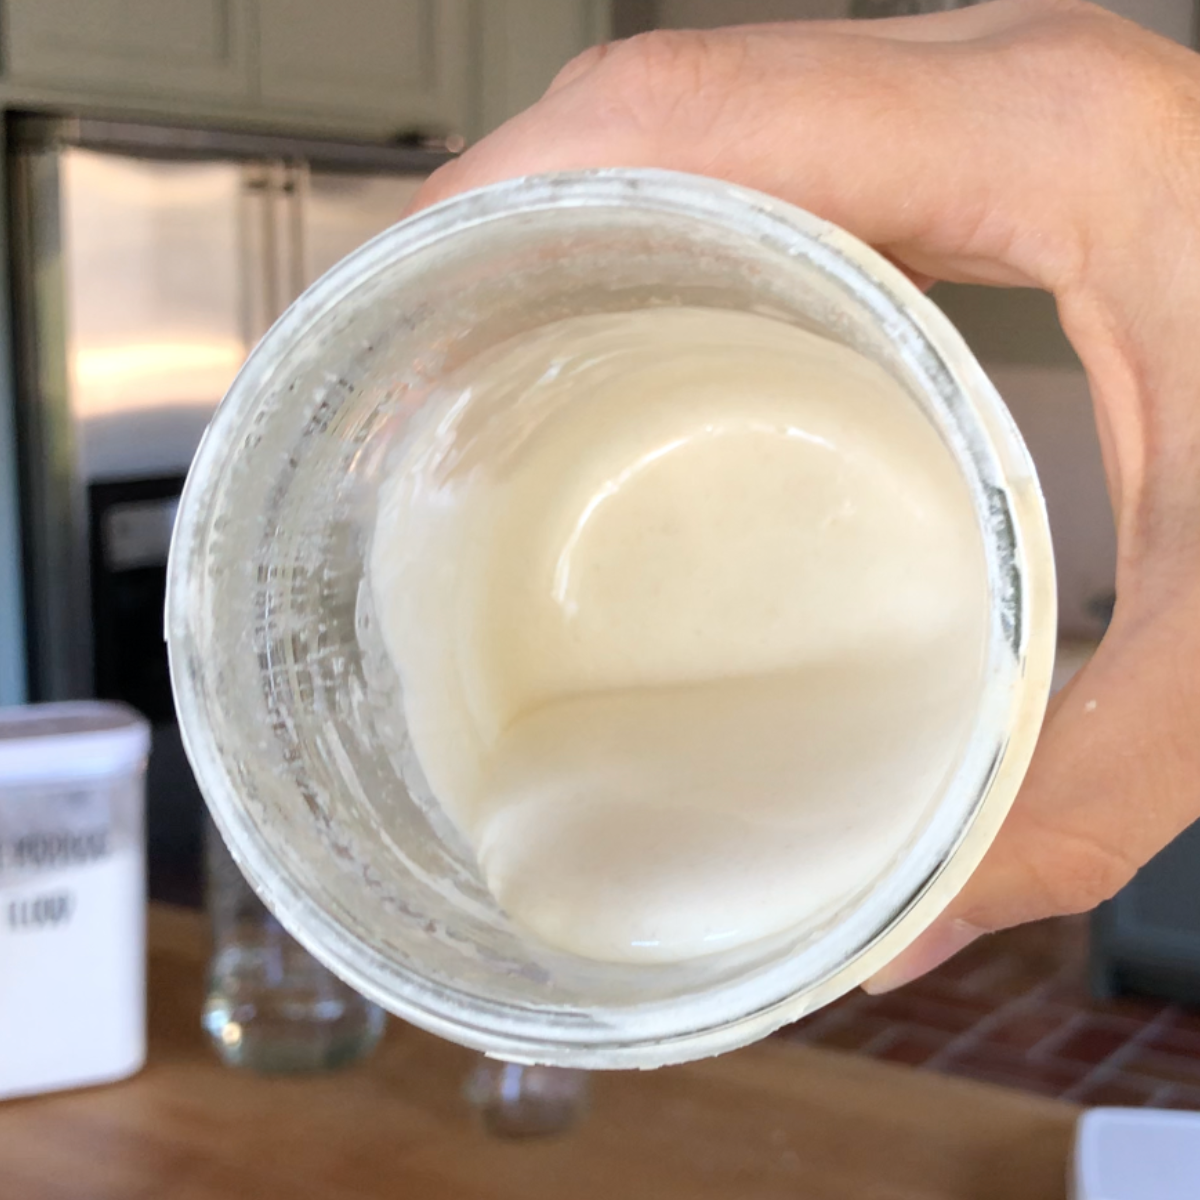
In the photo you’ll see a sample of what this refreshing routine may look like.
See the later section on how to use the fridge to delay steps if you aren’t able to be home all day or if you have to leave home unexpectedly.

Morning Starter Refreshing Routine
If you work a typical 9-5 schedule, teach, or tend to be out of the house in the morning running errands, then a morning starter refreshing routine would be a better fit for your lifestyle.
By refreshing your starter in the morning (preferably early morning, before 9am), by evening your starter will be active for you to mix your dough.
When you start your bread dough in the evening, you will likely want to go to bed before bulk fermentation is done so see the using the fridge to delay sourdough steps.
Here is a sample of what a weekly sourdough schedule might look like for a morning starter refreshing routine:

Weekend Only Sourdough Baking
Some of you literally have no time during the week to do sourdough baking.
The weekends are your ideal time to do all your sourdough baking, so I have some strategies for you.
First, keep your sourdough starter in your fridge all week.
To bring it back to having vigorous activity after its fridge hibernation, I recommend doing two refreshing processes 12 hours apart.
So Friday morning and then again on Friday evening or Friday evening and again on Saturday morning.
If you did Friday AM and Friday PM, your starter will be active and ready to use on Saturday morning.
Or if you did Friday PM and Saturday AM, your starter will be active and ready on Saturday evening.
You can refresh again to make sourdough on Sunday.
See this sample for what weekend only baking might look like:

Using the Fridge to Delay Sourdough Baking Steps
The fridge allows you to do a cold bulk ferment (aka first rise) or a cold proof (aka second rise) at different stages of the sourdough baking process.
It’s not a perfect formula, but roughly 5 hours in the fridge is like 1 hour at room temperature.
I prefer to let my dough ferment at room temperature for at least 1 hour up to 3 before putting the dough into the fridge for a few hours to overnight.
After the time of bulk fermentation in the fridge, I let the dough sit at room temperature for 1 to 3 hours longer until it comes to room temperature and shows the signs of completing bulk fermentation.
During the proofing stage, there are two ways I prefer to delay fermentation:
- If you only need a short delay for errands or a busy time of day, allow the dough to proof until nearly completely proofed about 1 hour short of the full range then place dough in its final shape into the fridge for 1 hour up to overnight.
- Cold proof the shaped dough overnight for 8 to 14 hours.
Make sure your dough is well covered with plastic wrap if in a large mixing bowl or with a shower cap if in a loaf pan or proofing basket.
I also use cambro food storage containers for bulk fermentation which work well in the fridge.
Learn more about using the fridge for fermentation in this post: Cold Fermentation vs Room Temperature: Which Is Better?

Do you need to let Dough come to Room Temperature after Time in the Fridge?
Dough that has bulk fermented in the fridge should come to room temperature so that it is easier to shape.
When it comes to shaped dough that has spent any time cold proofing, whether it needs to come to room temperature depends on the type of bread dough.
For sourdough sandwich breads, baguettes, or boules, I prefer to bake them still cold after the cold proof for a great oven spring.
Enriched breads (i.e. cinnamon rolls, brioche) bake better if they come to room temperature after the cold proof.
How to Create a Sourdough Baking Schedule Step by Step
- Evaluate your typical week and note times when you will be out of the house or especially busy.
- Choose when you will doing your starter refreshing routine: morning, nighttime, or weekend only.
- Your chosen starter refreshing routine will determine your sourdough bread baking timeline for next steps.
- The morning after your nighttime refreshing or the evening after a morning refreshing, you will mix your sourdough recipe (sandwich loaf, boule, or other) and begin the fermentation process.
- After 5-7 hours* (unless you need to delay the dough in the fridge overnight or longer for bulk fermentation), schedule your time for shaping the bread dough.
- Once the dough has been shaped, it must do its final proof for 2-3 hours* at room temp (unless you do a cold proof) before you bake.
- After you’ve made your bread dough, refresh your starter and let it become active again and put it into the fridge for careful storage until the next week.
*Time ranges can fluctuate based on the recipe ingredients. The amount of time described above are for typical sourdough bread recipes, recipes more enriched with butter, oil, or eggs often have longer time ranges.
Temperature Fluctuations and Planning
The changes in season and weather can present another challenge for new sourdough bakers.
The temperature of your kitchen can also vary based on factors like how much you use your heater, AC, or if you have a wood stove running.
Wild yeast and all yeast thrive in warm temperatures so if you keep your house especially warm or in summer time, expect all your time ranges to be on the short end.
For example, my method of refreshing a starter takes 6-12 hours to become active. In warm weather, that range will be 6-8 hours.
In winter time or if your home runs colder, you need to allow nearly the maximum amount of time for each fermentation step. Sometimes you may even need to add time.
If your house is especially cold, try to find a warm place to keep your starter and dough as it is rising.
Best Practices for Creating a Sourdough Baking Schedule
- First of all, use your fridge for your starter! When you get busy and don’t have time to care for your starter, put it in your fridge.
- To create the most vigorous active sourdough starter that will give you the best results in your baking, refresh your starter twice after a few days up to a week in the fridge before using in a recipe. These refreshes can be 12 hours up to 24 hours apart.
- Use the leftover starter from the first refreshing post fridge rest in a sourdough discard recipe or in a sourdough recipe like tortillas that does not require the best rise.
- The fridge is also very helpful with your dough during bulk fermentation and/or proofing to make sure sourdough baking fits into your life and you don’t have to choose between sleep and baking.
- Make your sourdough baking fit your life and schedule, not the other way around. This allows you to create a sustainable sourdough baking schedule that won’t burn you out.
- If you only have one day suitable for making sourdough bread, you can overlap recipes as long as you make enough sourdough starter. For example, make the dough for sandwich bread and pizza dough at the same time and do the proceeding steps in sync with each other.
How I plan my week of sourdough baking:
The timing samples above are in the format that I use for my sourdough planning
For my own planning, I create a weekly meal planning worksheet where I note meals, prep tasks needed, groceries, and any major calendar activities.
Since we have a big family, I typically double my sourdough bread recipes since we go through sourdough loaves very quickly.
During most days of the week, I refresh my sourdough starter every evening to keep it healthy with consistent activity.
That way, even if I didn’t plan to make a particular recipe, I still have the option to make a sourdough recipe if inspiration strikes.
See the example below of how I plan a typical week. The meal options change based on the season and what my family is enjoying eating.
I like having the meal options to circle each week so its less decision fatigue for me!

Get my Menu Planning Template
I have created a blank, edit-able copy of my menu planning template that I use for grocery planning, sourdough prep, and meal planning.
You can get a copy here: Get my FREE menu planning template
Favorite Sourdough Recipes for Weekly Baking:
- Sourdough Country Bread (perfect for beginners with step-by-step instructions with photos and videos)
- Sourdough Honey Oat Whole Wheat Sandwich Bread (a great go-to recipe for a healthy wholesome bread)
- Sourdough Tortillas (easy sourdough bread recipe)
- Sweet and Simple Sourdough Bread Master Recipe
- Savory Sourdough Cheese Twist Rolls
- Easy Sourdough Cinnamon Rolls
How to Plan Sourdough Baking for Holidays and Special Occasions
Planning sourdough for an upcoming holiday or special occasion takes similar consideration to weekly scheduling but requires more attention to the ready to serve and enjoy stage.
For holidays and special occasions, you will need to choose your serving time (e.g., Christmas dinner, Easter brunch, birthday breakfast) and then work backwards to determine when each step will take place.
See this post and video on holiday sourdough time planning for more assistance!
Serve your bread without serving your bread
The “bread mom” jokes on memes and social media are funny, but they are not how I operate and probably not how you want sourdough baking to feel in your home.
Whether we are busy moms or have a full workload, we simply want fresh sourdough bread on a regular basis.
By creating simple routines and schedules, we can develop the consistency in sourdough baking that will make it a habit that sticks for the long haul.
Get best results faster by using my timing resources below and developing a solid sourdough foundation with my online course.
Just getting started with sourdough?
A competent guide transforms sourdough baking from overwhelming to uncomplicated and fun!
Get My Free Quick Start Sourdough Guide: Learn the key terms and concepts in sourdough baking, including the differences between active sourdough starter and sourdough discard, and how to care for your starter.
Start Baking Sourdough Confidently—Take the Intro to Sourdough Course for Just $27!
Time Planning Help for Sourdough Baking
The #1 need for sourdough bakers is help with time planning, so I created a resource for you.
Sourdough Time Planning Workbook: Perfect for new or experienced bakers, this workbook includes 8 templates ready to fill in and a baking journal. The templates cover 4 different ways to make classic sourdough country breads, 3 time planning worksheets for enriched sourdough bread depending on serving time target, and a blank template. The baking journal goes over baker’s percentages and how to take notes on your sourdough bakes.
Get a free sample of the workbook: Use this sourdough time planning worksheet sample to simplify your baking.
Living Bread Baker posts mentioned
When is sourdough bulk fermentation finished?
When is sourdough finished proofing?
Cold Fermentation vs Room Temperature: Which Is Better?
How to Make a Big Batch of Sourdough Bread (Calculator)
How to Plan Your Christmas Sourdough Baking Schedule
Beginners’ Guide to Sourdough Bread Baking Tools on a Budget
Shop this post
FREE Sourdough Quick Start Guide
Sourdough Time Planning Workbook & Baking Journal
My Intro. to Sourdough online course
Sourdough Time Planning Workbook & Baking Journal
This post contains affiliate links. Read my policy here.


Hi Jenny,
Thank you so much for all your help in the world of Sourdough 🙂
When you say that having 2 refreshes is best practice…after you refresh the first time- how would you do the second? As in do I take only 15-20 grams of the refreshed starter and mix that with 60 g water & flour, OR do I weigh the whole refreshed amount and feed that the ratio of 1:3:3.
Thanks so much for helping and clarifying this for me!
Hi Alicia, You’re very welcome! And I’m happy to clarify. So for the two refreshes, you would take out your starter from the fridge. Take a tablespoon amount (15-20 grams) and place it into a new jar and feed it with the 60g water and 60g flour. Let it at room temperature. After it becomes active, you’ll take a tablespoon amount (15-20 grams) from the active batch, place it in a second new jar and feed it with 60g water and 60g flour.
And of course, instead of using the second jar for the second refresh, you could pour off 100-120 grams of the starter into a discard collection jar and then feed the remainder 60g water and 60g flour.
This will give you a strong, vibrant starter for your recipe after its rest in the fridge.
For the second refresh, you would only want to increase the feeding amount if you were making multiple loaves of bread.
I hope that helps!